Hey guys,
Just wanted to share my tutorial because steam forum has moved several years ago and my topic is lost...
May not be very usefull but still interesting I guess... cheers !
[HOWTO] Full Goldsrc => Source Tutorial
Hi there,
After releasing my map for Counter-Strike, I was wondering how can I convert it so players could play on it in Counter-
Strike : Source.
Ok, it's not exactly true. I tryed some stuff in the devellopement of the map, that helps me a lot to understand what I
need to do to prepare the map before conversion.
What you need
- Your map, in both *.rmf and *.map
- ALL your *.wad (wads from gcf needs to be extracted, use GCFscape)
- Hammer v3.4 or 3.5
- Half-life Model viewer OR - Jed's half-life mdl viever
Compiler&decompiler (for Half-life 1 models) :
- studiomdl.exe
- mdldec12.zip
- MapFool v1.2 (for the textures)
Source SDK, with hammer launched at least 1 time, with the correct game your making a map (VERY IMPORTANT).<br>
- VTF EDIT
Textures
Ok, let's begin with it. First, Install mapfool. This tool is intendend to updated your *.map to source engine.
Unfortunately, Worldcraft 3.3, Hammer 3.4 can't manage to save a *.map file, and then re-opened it correctly (You get a message error "Dur to error in the file 348789454 solids were not loaded" then hammer crash...). I spend lot of time trying to get a solution, but din't found. No matter.
So, we're gonna use mapfool for the textures. Go to file=>Options, you should get something like that :
Add you wad files. Be carefull, they should have the exact name as specified in Hammer v3. That's because mapfool reads by
WAD, not by texturename.
Also, add the path to "vtex" (Valve texture converter). In my case :
Steam\steamapps\<username>\sourcesdk\bin\ep1\bin\vtex.exe[/CODE]
Ok, now go to file>Open and open you *.map file
Go to Tools > export textures as TGA. Browse a folder. For example :
Steam\steamapps\USERNAME\counter-strike source\cstrike\materialsrc
YOU'LL NOTICE THAT SOURCE ENGINE DOESN'T ALLOWS TEXTURES THAT ARE NOT POWER OF TWO. So you NEED textures that's 16x16, 32x32, 32x64, 64x64, etc.... 96x64 will not make it for example.
Now it's time to make them VTF, go to Tools>Make materials
Select the folder you exported the TGA
Steam\steamapps\USERNAME\counter-strike source\cstrike\materialsrc
The calculated folder should fill in by itself. This is because of the Gameinfo.txt countained in the cstrike folder.
Okay, now tick the two boxes "Created vmt file" and "display generic output". This is very usefull to know what VTEX does,
and understand where do he put's the materials. Thus, this is usefull if there's a problem too.
If you've done all correctly, you should get a lot of file in you /material/ folder. You can drop them in a new folder, but
in this case, you'll need to re-edit each *.vmt file...
RMF File
Ok, the tricky part.
Open your *.rmf in Hammer v3, and make some blocks somewhere in the map with all the tools you used :
(I forgot ORIGIN, even if it's unused in source, it could be usefull to add it)
(I also forgot {blue or {transparent texture that you may use -if it's the case that means ur a great mapper ;)- ).
Ok, close it, and run Source SDK and hammer 4.
Open your RMF...
...SURPRISE !!!...
yeah, nothing happens. You get the blocks, but can't see your map in the 3D-View... So, just click on that camera, get
around the 3D-view a bit. Then, click on a 2-D view that is centered with lots of your blocks. This will change the camera
position, and helps you a lot :).
Now you'll see lot of white textures... don't worry. When compiling the maps, they will disapears. The textures that are
not power of 2 will get pink/black... Annoying I know. If you want your textures in the Hammer 3D-view, you'll need to
replace all of them 1 by 1...
Ok... now remember the specials textures/blocks we made before ? Just replace it with theyre new equivalance
Black => toolsblack
CLIP => toolsblockbullets OR toolsclip (depends)
NULL => toolsnodraw
aaatrigger => toolstrigger
SKIP => toolsskip
HINT => toolhint
SKY => toolskybox
Origin => origin (no tool here, just your origin brush so it will help you to remove them)
{blue/transparent => toolsblockbullets OR toolsclip OR toolsnodraw (depends on what u used them)
This will be a good beggining !!
Entities
Lot's of entities will disapears some won't. Let's do a list :
Point entities
- ambient_generic :
They still exists !!! Thus, the "Radius" flag is now replaced by "Max Audible distance" value. Don't forget to copy your
sound from cstrike/sounds/ to cstrike/sounds (source)
- camera_target
Obsolete. Replace it with point_viewcontrol.
- cycler_sprite
Obsolete. It's replaced by prop_static, prop_dynamic, etc... See next chapter for more.
- env_beam
Still Exists
- env_beverage
Still exists. See valve's wiki for more : http://developer.valvesoftware.com/wiki/
- env_glow
Obsolete
- env_shooter
still exist
- game_text
Still exist
- info_player_start (CT start)
Now, that's *just* half-life start. You'll need to replace them by "info_player_counterterrorist"
- info_player_deathmatch (T start)
Obsolete. Replace it by info_player_terrorist"
- info_target
Still exists
- light
Still exists. More values and possibilities I guess
- light_environnement
Still exists. Thus, the value are not the same. You may be a little irritated, because it doesn't work the same. Also,
don't forget to put a "shadow_control" entity.
- multi_manager
Obsolete. Now, all entity that targets something have an "Ouputs" stuff that replaces the multi_manager.
- trigger_changetarget
Obsolete. New logic_ entities stuffs.
Brush entities
- func_wall
Still exist, but appears black. Replace them by "func_brushes"
- func_breakeable
Still exists. Appears black too. Breakable windows can use "func_breakable_surf" now (see tutorials for more).
- func_bomb_target
Still exist.
- func_escapezone
Obsolete
- func_ladder
Still exists, but you should use toolsladder instead
- trigger_once and trigger_multiple
Still exist.
- trigger_hurt
Still Exist
World Models
Now the interesting part ?
You already know half-life 2 uses LOOOTs of models. Way more than half-life 1. Thus, much counter-strike 1.6 maps now use
models. Cs_italy (chiken !!) or cs_bikini for example.
Half-life 2 have three type of models :
- static : it's just something that won't move at all, a building for example. (entity : prop_static)
- dynamic : it's a model that will move (with an animation). Also, I guess the shadow will move too (entity : prop_dynamic)
- physic : a model that is physic, so when you shoot at it, it blows away !! Funny !!! (entity : prop_physics or prop_physics_multiplayer)
You must now that every model has specification. It can be rather just static, or just dynamic, or static and physics.
Ok, now you understood this, let's convert our original models to half-life 2 engine !!!
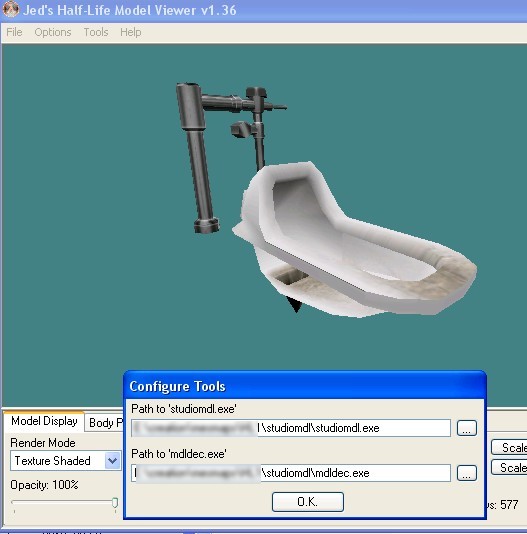
In this example, i'll use the japanese toilet from CS:Condition Zero (I love it).
Go to "tools" > Configure tools, and get the path from studiomdl.exe and mdldec.exe (the tool I made you download at thebeginning".
Ok, now go to tool => decompile model, and choose your model.
Once it's done, create a new file name "mdldecompiler.qc", and put this :
// where your model is
$cd "C:\decomp"
// model name and folder
$modelname "props_cz\japanese_toilet.mdl"
$model "Body" "japanese_toilet.smd"
// texture folder
$cdmaterials "models\props_cz\"
// Model uses material "toilet.vmt"
// Model uses material "toilet1.vmt"
// put staticprop for non-animated models
$staticprop
$hboxset "default"
$origin 0 0 0
//type of surface, see http://developer.valvesoftware.com/wiki/Material_surface_properties
$surfaceprop "tile"
// you need at least 1 sequence
$sequence idle "idle" act_idle 1 fps 30.00
Ok, now you have to use studiomdl.exe from sourceSDK. We better create a *.bat file. So go to
Steam\steamapps\adam050986@yahoo.fr\sourcesdk\bin\ep1\bin
Create a new txt file (that you'll rename studiomdl.bat), and fill something like this :
E:
cd E:\jeux\Steam\steamapps\adam050986@yahoo.fr\sourcesdk\bin\ep1\bin
studiomdl -game "E:\jeux\Steam\steamapps\adam050986@yahoo.fr\counter-strike source\cstrike" "C:\decomp\mdldecompiler.qc"
pause
Ok, now just double click on your *.bat. If you didn't messed up with the folders, it should work.
Now you have the model, you need to do the texture.
Grab your model texture (toilet1.bmp and toilet.bmp). You need them to be power of 2 (again). In most cases, they are, but here there not. Just resize them to a close value (bigger is better I think). In this case I use 256*512 and 256*256.
You need to convert it to tga. I use "Photofiltre" free program for this.
Now you need to made the VTF. Grab the TGA, and get them in you cstrike/materialsrc/. Now it's done, grab them again to vtex.
Reminder : Vtex is located in the folder :
Steam\steamapps\adam050986@yahoo.fr\sourcesdk\bin\ep1\bin
Now it's done, go to your materials/ folder, grab the two vtf, and drop them in "materials/models/props_cz/".
You now need to make two *.vmt files (use notepad of VTFEDIT), like this :
"VertexLitGeneric"
{
"$baseTexture" "models\props_cz\toilet.vtf"
"$model" 1
}
"VertexLitGeneric"
{
"$baseTexture" "models\props_cz\toilet1.vtf"
"$model" 1
}
You folder should be like this :
Now, just open hammer, create a room, a light and an info_player_terrorist. Create a prop_static or prop_dynamic, choose
your model (oh, by the way, the model can't be seent in SourceSDK's model viewer. I don't know why).
The model should display in hammer. Maybe it will not perfectly. Just run the game, and woohoo !!!
SUCCEED !!!!!!!!!!!
Tips you need to know
Since your new to SourceSDK, here are some various tips :
- Your are taller in Source (like 1,80 meter rather than 1,64m). You may not pass some corridors.
- Make your own testchamber (a big hollowed block with 1 spawn and a light point). I bet you'll love to test all the new things.
- Compiling time maybe very long. Don't forget to use "-fast" with vvis when compiling for you (*NOT* for finale compile !!)
- Learn about compiling options. About that HDR stuff : don't bother with it. Just compile with the "-both" on you finale compile.
- Don't forget env_cubemaps entities. These stuffs will allow you to make some reflective effect on some props/models. It's very important to have some (minimum 1 by room). You need to build them in-game with "buildcubemaps" command in console. Read some tutorials about it.
- READ TUTORIALS
FAQ : Question & Answers
The result is UGLY !!
Well, you have to face it. A beautifull map on Goldsrc will look average on Source.
Goldsrc textures are average dimension of 64*64 or 128*128. Source Textures are average 512*512... so you may have to look
for some textures on the internet (if you prefer using new textures instead of the classical textures that everyone knows
by heart).
Proooaappsss ?!?
You'll also need to use way more props. I get them from about all mods that exists on Source (but I always give credits,
since my work is not a commercial project). And If I use a model, that means it's a cool work that deserve to be seen by
more people than it's usually made... so cheers ;).
This or this doesn't work !!!
Yeah me too, it was the case, that's why I made this tutorial. I think you had already learn much about some stuff I asked
myself for hours...
In 95% of the case, it's just a folder stuff or stupid problem. Be aware, read your compile logs (I get fucked because I
didn't notice that vbsp crashed because of a bad command propreties, so I was always testing an old version of my map...).
Also, read your console, errors always appears on RED, and will help you a looot !!


 here you are
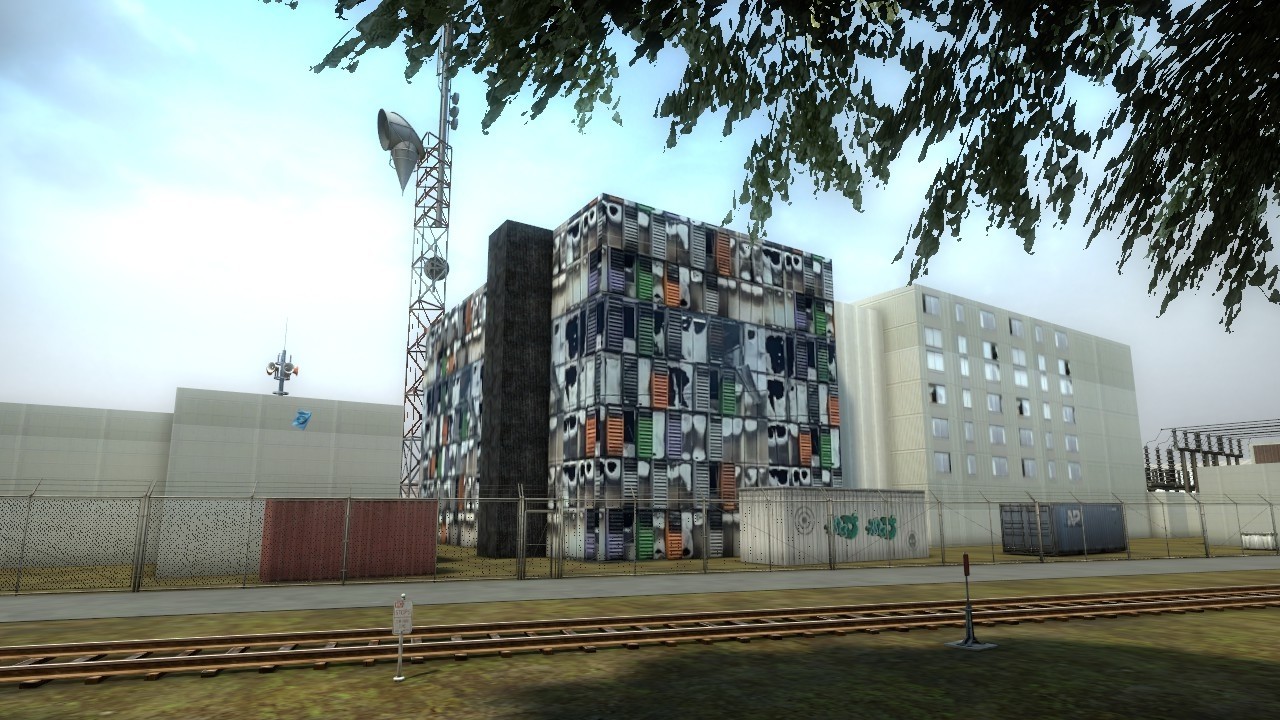
.jpg.4b30b6027b4833f8f56ef603281c01c7.jpg)
.jpg.ba71e9aa6c3fb1e1d9ea917f0e53a5bd.jpg)