

Index:
Creating a Single-Player Combat Space Part 1
Creating a Single-Player Combat Space Part 2
Creating a Single-Player Combat Space Part 3
This article is the second installment in a three-part article that looks at the considerations for creating a single-player combat space, using a walkthrough of the first battle in ‘Killzone Mercenary’ as a working example.
First Backup Trooper
When one of the two assault troopers is killed, a ‘backup’ trooper is introduced who drops into the environment to replenish the numbers. This is the first stage of ‘re-directing the front’ towards the exit out of the ground floor and first section; the climbable pipe. This assault trooper enters the environment from the final exit of the whole arena on the floor above in order to further establish this area as an important location. Two vault-down animations are used before this trooper lands on the ground floor. The longer movement and animation catch the player’s eye if they are concentrating on the original enemies ahead of them, as the new enemy’s entrance is in the top left section of the screen.
The new trooper won’t shoot the player until he’s landed, or has been shot himself. This is because if he started shooting from the higher level, he would have too much of an advantage over the player for this stage of the fight. As the player also has slightly more time to target this new trooper before his landing, if they're quick enough they can shoot at him before he drops. This shifts the player’s angle to be more vertical, changing it up from the mid-level shooting they started with.

An extra trooper has two animations before entering the arena at the side
The landing position of the new trooper starts to shift the focus of the combat further towards the left of the screen and to the side of the environment. There isn’t immediate cover for the new trooper to use straight away, as there was for the first two troopers, which further makes this new trooper an easier target when they first enter. If the player doesn’t manage to take this trooper out at the start, the ‘front’ is beginning to move 90 degrees to the left as the available cover within 10 meters of the trooper is positioned this way (see image below).

The combat fronts begin to turn with the introduction of the new trooper
It was important for me to gradually turn the player’s focus using an enemy at the side of the screen as I didn’t want to introduce new enemies off screen. This is because it’s a harder combat situation to deal with which would have been too tough this early in the game. It is sometimes desirable for a designer to bring enemies in off screen depending on what they want to achieve (such as making the player feel ambushed or overrun with enemies), but to ensure the player doesn’t feel cheated it’s important to make them aware of their arrival. Depending on the game’s style and the available mechanics, there are different ways in which to achieve this. In KZM we had to consider the manner in which the NPCs announced their off-screen arrival, rather than focusing the camera on them, as the player maintained camera control throughout. For example, a rocket trooper could be scripted to shoot their weapon somewhere within the player’s view; the explosion would grab their attention and the smoke trail would indicate the direction it came from. A sniper trooper however, didn’t need any specific scripting as the red laser sight on their weapon showed where they were positioned and where they were aiming. Furthermore, their behavior was such that their initial aim was inaccurate but improved the longer they had their target in sight, i.e. the longer the player stayed out of cover. This meant that the red laser sight would pass the player if they were looking away thus grabbing their attention.
Re-directing the Front
It is possible for the player to target the third trooper by remaining at the starting position by the door if they choose. In order to fully change the combat ‘front’ however, two more enemies are introduced who flank the exit, forcing the player to move into a new cover position. This is because the player doesn’t have protective cover to their left side and is now vulnerable to attack. Forcing the player to move ensures that they experience the combat encounter in a different way and that the battle doesn’t become static, repetitive and boring.
I re-directed the combat focus towards the exit of the ground floor by entering these two assault troopers next to the climbable pipe. The cover positions for these two troopers are two pieces of low cover (within 10m from the pipe) to either side of the exit, framing the view to it. When they take cover here this establishes the new enemy front, which forces a new front for the player and the buddy.

Two assault troopers enter the environment in front of the pipe
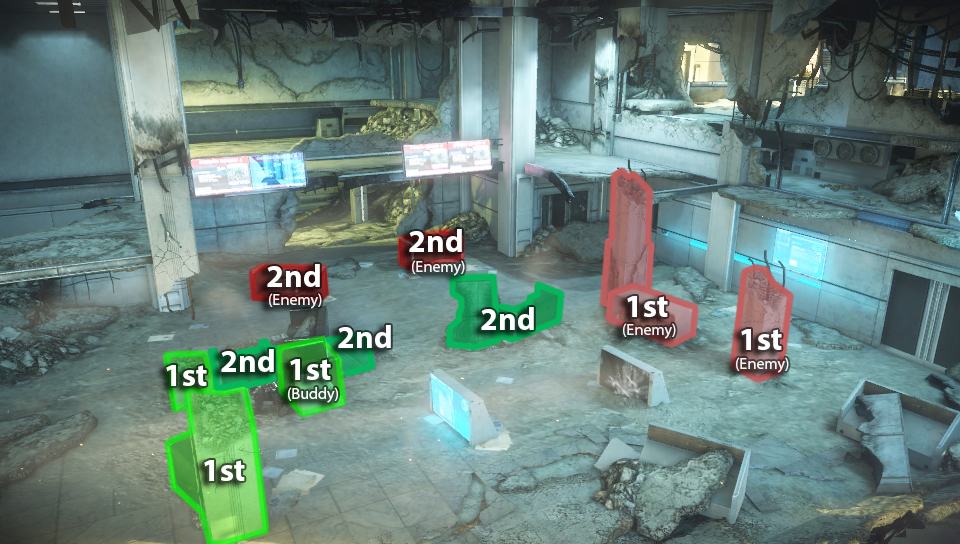
The player’s new front becomes the line of cover facing the enemy’s low cover, which is perpendicular to the original front (see image below). There are a few options for the player to position themselves across the front and this determines how the enemies move and react.

The new fronts for the player and enemy
No Man’s Land
This part of the encounter also has a small ‘no man’s land’; an empty section of ground clear of any cover or obstacles. This ground is more risky and dangerous to cross and as such is a good way to slow the player down without artificially forcing them to; players tend to deal with the threat before crossing unsafe open ground. The reason I wanted to slow them down here was to ensure that they killed the troopers before engaging with learning a new mechanic; climbing the pipe.

No man’s land between the player and enemy fronts
Audio Consideration
When I first started creating levels I never really considered using audio as part of the design. Cleverly designed audio can have a huge impact on the player’s experience and as such is one of the best aspects for designers to use, albeit one of the most overlooked. In this arena I had originally planned to have a large puddle of water next to the climbable pipe, caused by a leak. This was in order to have an audio indication of the assault troopers jumping down into the arena by having them splash on landing. This would give audio orientation to the arrival of a new threat and would help to grab the player’s attention alongside any graphical representation. There were also other areas of water that were intended to highlight the footsteps of any flanking enemies as pockets of water splashes are more distinctive than the standard footsteps.
Although ultimately this wasn’t implemented in this area we did manage to get a similar element into the following arena to highlight the location of a hidden valve, which was an alternative method of completing the objective as well as one of the challenges. This was a pipe next to the valve that had a particle effect dripping on to a piece of metal, giving a distinctive audio cue. Although this didn’t use any puddles or influence enemy footsteps, the dripping particle effect and accompanying audio did grasp the player’s attention and helped them to discover the hidden valve.
Climbable Pipe
The image below shows which pieces of cover have been needed so far and how the arrangement of the combat space has unfolded.\
The cover that has been needed so far
After this wave of combat has been completed, the climbable pipe is the route up from the ground to the floor above. The pipe should be in the center of the player’s view as it’s directly behind the last two troopers, but if this is not the case the buddy character helps by leading the player’s eye and focus by running to the pipe itself. He also climbs up when the player is in close enough proximity, thus introducing the tutorial for the climb mechanics.

The buddy introduces the climb mechanic
Second Wave
After the combat with the last two troopers, the pacing of the combat slows down to allow for a mid-encounter break. This isolated period of calm is not only used as time for the player to scavenge ammo and restock before the next battle, but also to introduce the new shop mechanic and the jump ability.

The pacing of intensity throughout this first arena
After these mechanics have been taught it is then time to kick off the second wave of combat. The Helghast Dropship returns at this point, when the player and buddy successfully jump over the gap and end up with a view of the Dropship arriving.
The Dropship arrives within the player’s view from the balcony
The Dropship arrival flight path was custom created by our animation team to fit with the environment, however the resulting rappel of enemies had a specific animation height we had to consider. The troopers rappelled 15m down to the ground, so we had to take this into consideration when creating the room height, as well as the height the player was going to be at to get the full view of the sequence.
The four rappelling troopers also needed specific points to land on that were clear of any other geometry. This had to be positioned into the previous combat zone between the existing cover positions; I was re-using the environment by re-purposing the use of the main space, making the level bi-directional and efficient.
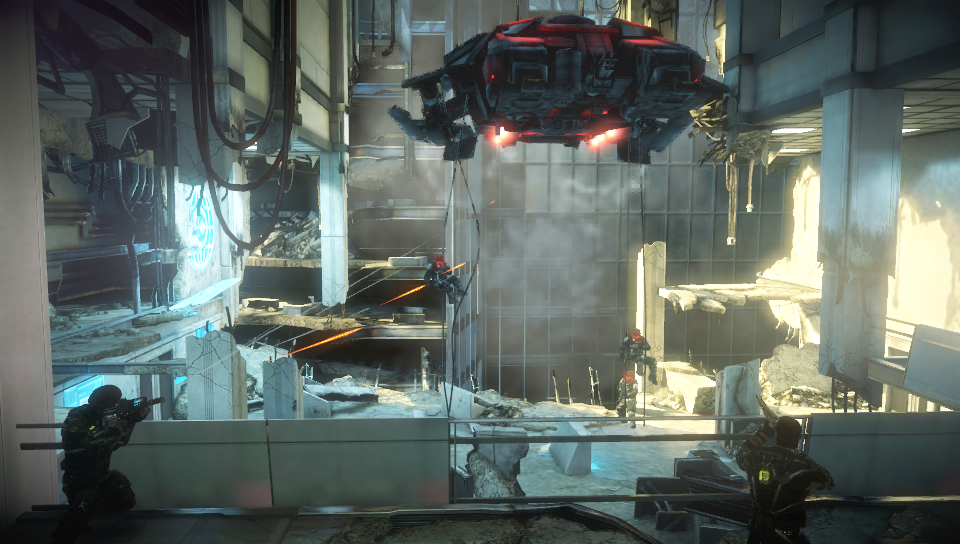
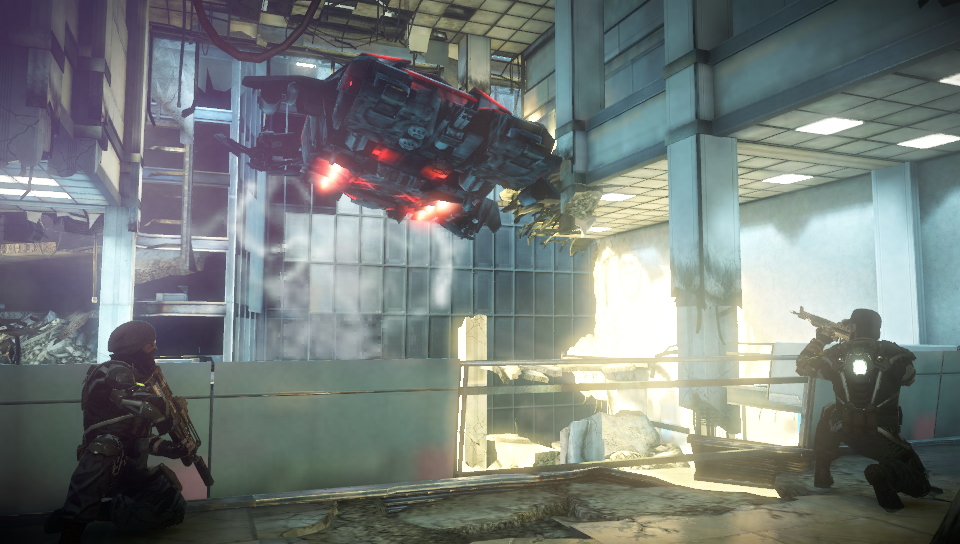
Assault troopers rappel from the Dropship into the environment
The rappelling troopers land in the middle of the ground floor and need cover to move to. The previous front for the player now becomes the front for these rappelled troopers and the balcony on the floor above is the new front for the player and the buddy.
I added two additional cover points into the center of the floor so that the troopers wouldn’t all immediately run forward to the cover on the front, but would remain staggered for a more layered combat. The new cover pieces were also low cover so that they didn’t block the view in the initial combat sequence, as well as keeping the troopers in view from the player’s elevated position whilst they’re crouching in cover.
The player also now had a higher vantage point on to the enemy, being 4 meters above them on the balcony. The player’s height advantage meant they could shoot down on to the enemy and as these troopers were mostly using low cover they were even more exposed from above and thus easier to target.
The high vantage point also allows the player to experience the environment from a different perspective, keeping the combat from being repetitive. The increased verticality of the player’s position also means that from this perspective (in comparison to a flatter one) it allows the player to target more layers of enemies rather than losing the target of background enemies behind foreground enemies. What’s more, the longer combat distance between the player and the enemy here is a further change to what they have previously played at the start of the encounter. The longer combat distance is also necessary at this specific point in the game as it was the point of introducing the aiming-down-sights tutorial for the second time; the first being introduced during the first pair of troopers. It also means the enemies are more difficult to hit from further away and the player is less likely to hit an enemy without aiming-down-sights.

The troopers spread out more than half a screen’s width over multiple layers
To balance the fight so that it wasn’t too easy a climax, the cover arrangement here allowed the enemies to spread out and cause more of an issue for the player whilst still maintaining a central position. The player would have to move their aim more than half a screen’s width to target all the enemies, so this was a step up in difficulty from the easy start with the more static troopers.
Go back to part 1 or continue to part 3. Any thoughts? Check out the comments!
Copyright ©Peter Ellis 2016. Killzone™ Mercenary is the property of Sony Computer Entertainment © 2013. Killzone is a trademark of Sony Entertainment Europe. Killzone: Mercenary is a trademark of Sony Computer Entertainment America LLC.


.thumb.png.38683d9fe22b81d6541ae23dacf74ca8.png)

