Leaderboard


Popular Content
Showing content with the highest reputation since 10/08/2012 in all areas
-
Hey, I've decided to make a topic where I'll put together all the links to different stuff I've released for Source/CS:GO. Assets Assets from my CS:GO maps. Free for non-commercial use as long as you give appropriate credit. Basalt Most of the assets from the map Basalt. https://www.dropbox.com/s/e86kdqwpvhhs5x6/Basalt.zip?dl=0 Breach Assets from Breach. Over 600 models and over 100 materials. Includes a zoo map. https://www.dropbox.com/s/xsfp5kobdv22voa/Breach.zip?dl=0 Thrill Assets from Thrill. Includes a zoo map. https://www.dropbox.com/s/tkgw959whnubnla/Thrill.zip?dl=0 Pitstop https://www.dropbox.com/s/x6tn3b6nfo2u77d/Pitstop.zip?dl=0 Cruise https://www.dropbox.com/s/q3ybhzd1p2q522t/Cruise.zip?dl=0 Resort https://www.dropbox.com/s/dwasa7bs5g3wo1a/Resort.zip?dl=0 Zoo https://www.dropbox.com/s/xehbw0k67tximp4/Zoo.zip?dl=0 Castle https://www.dropbox.com/s/e76x6st0nsbpafq/Castle.zip?dl=0 Water Pack Collection of 4 different water textures that work both on high and low shader settings. Free to modify. https://gortnar.com/vmt/liquids.zip Source Engine Tools Streamline the Source engine workflow. Mostly substance stuff. Substance Shaders (and templates) Newly updated shaders for Substance Designer and Substance Painter. Supports Diffuse, Envmap reflection, Specular reflection, Glossiness, Metallic (Diffuse tint), Fresnel ranges and LightmappedGeneric mode. Also includes Painter templates and export presets and a glossiness wizard filter for Painter that can be used to create glossiness and envmap mask maps from specular mask or roughness. https://gortnar.com/vmt/sbs_shaders.zip https://gortnar.com/vmt/painter_templates.zip VMT Editor PBR to Source A substance file and a VMT template that aim to match the PBR look as close as possible in Source (still a long way off). I don't suggest relying on this to make your materials (learn how Source handles materials instead), but it does an alright job with any PBR materials you might want to use in Source. Note that this converter only works on VertexLitGeneric. There's a brush version included but it requires manual tweaking based on the material. https://gortnar.com/vmt/pbr_to_source.zip Radar generator Generates CS:GO radar images, both regular and spectate versions. For multi level radars you have to use multiple generators and blend them together. Can be used with masks from Terri's auto radar. Requires you to make overview image, playable area and spawn/plant zone masks. https://www.dropbox.com/s/mij82s8x9q98189/radargen.sbsar?dl=0 Sun color calculator A quick test project, calculates the color of your light_environment direct brightness based on the fact that the final color depends on both ambient and direct. https://codepen.io/gortnar/full/xYJGLj/ If you have any questions, ask away!
 81 points
 -
WIP for my Portal 2 mod.65 points
-

[CS:GO] De_Grind
SkeletonKreg and 63 others reacted to The Horse Strangler for a topic
Sup peeps. Just finished another csgo map with buds @'RZL and @MaanMan. We've been working on this one for a good while now, maybe since December of last year. It was challenging at times, but we're finally happy to put it out there. WORKSHOP LINK Do you hate it, do you love it? Not enough sand? Let us know.


 64 points
 -

What I'm Working On
GrillusRetardus and 63 others reacted to FMPONE for a topic
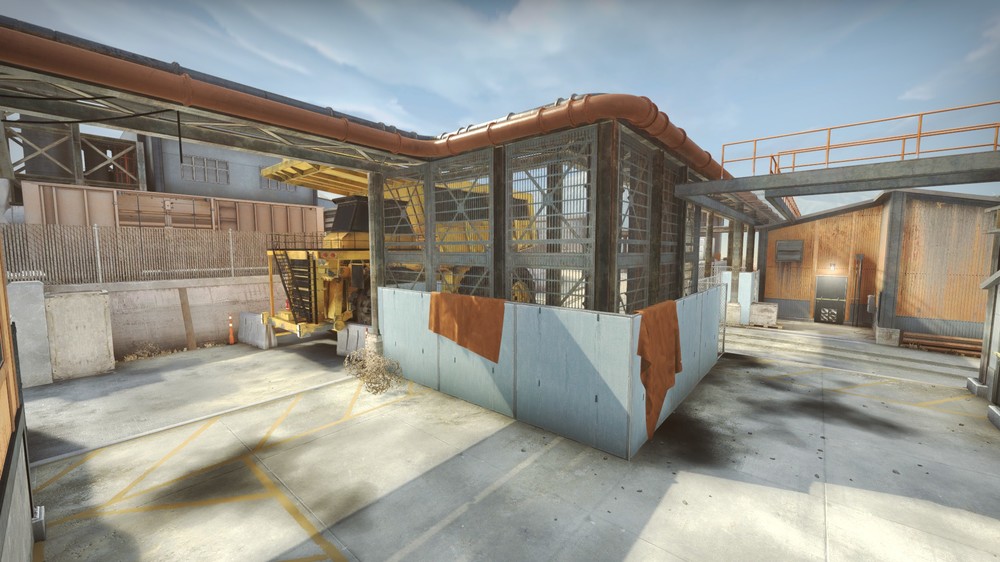
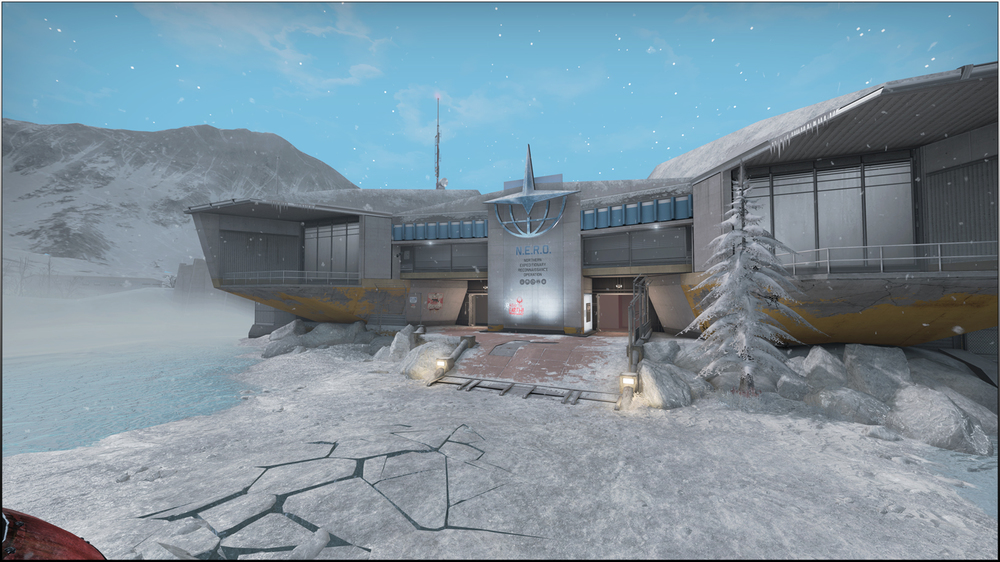
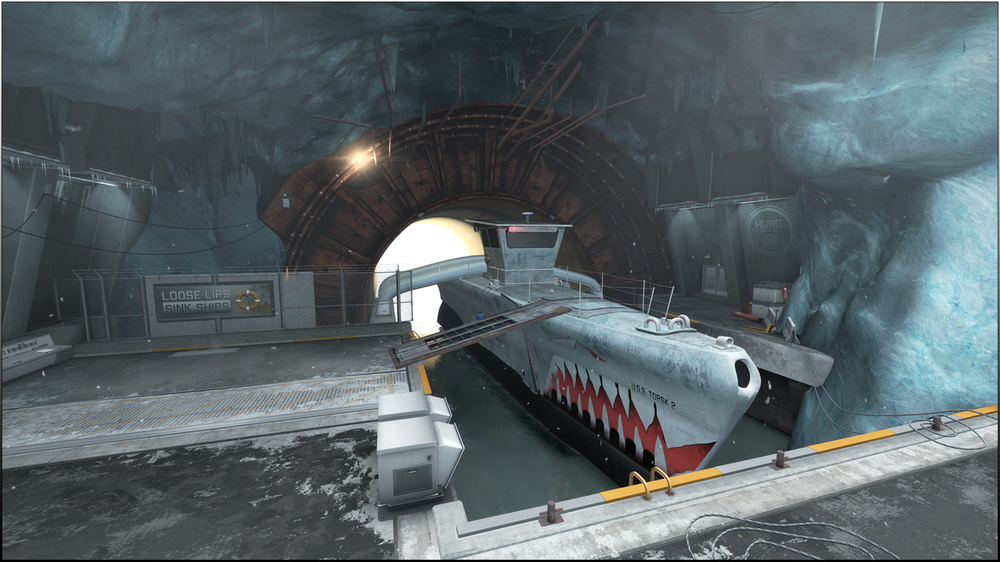
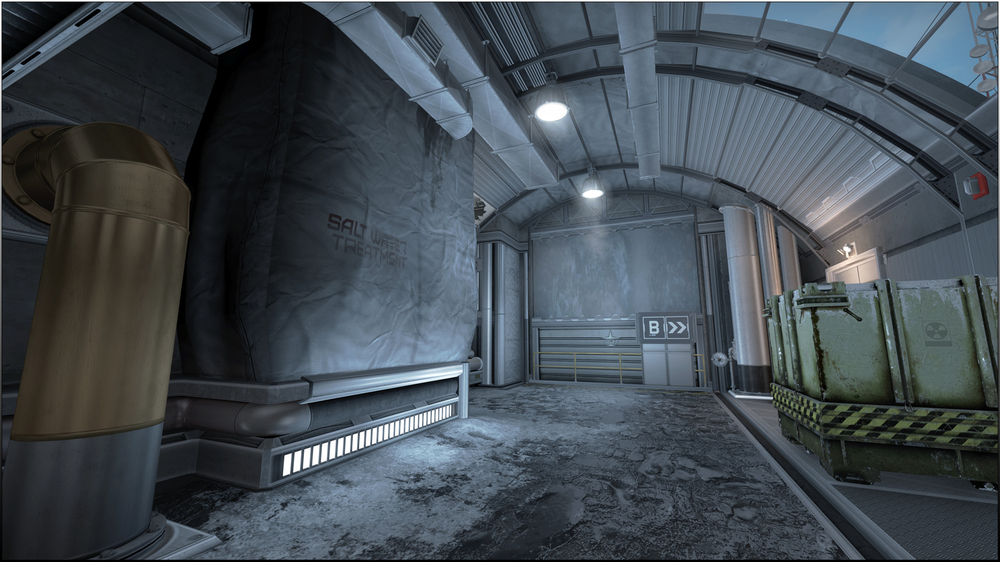
Hi all! Here's a preview of DE_SUBZERO. The awesome Tanuki (creator of Seaside and Downtown) helped design the layout, and I created all the art. However, penE from DE_CACHE made the old-school crates as a cameo, I love that guy Shout out to all the wonderful people who provided helpful feedback on the visuals and gameplay so far!


 64 points
 -
[CSGO] Transition
kunalht and 60 others reacted to The Horse Strangler for a topic
GO HERE FOR RELEASED VERSION61 points -
Info: Hello everyone! For the last few months me and @Thewhaleman have been working on our contest map called Chlorine. This defusal map is set in a recently closed and abandoned aztec themed waterpark. The map includes areas that support a variety of strategies and play styles to accommodate every type of player. My goal with this map was to create a dynamic gameplay space that allows players to execute a variety of different strategies. Chlorine features two bombsite that are distinct from each other in terms of gameplay style as well as visual direction. Bombsite A is located in the outside area of the waterpark, thus is more open and allows for more complex strategies. Bombsite B features more straight forward approach, being located inside a temple that almost acts as a movie set imitating a night settings with a starry sky. Overview of the map: Screenshots: Workshop link


 58 points
 -

VMT Editor - fast and simple editor for vmt files
That50'sGuy and 55 others reacted to Yanzl for a topic
LATEST UPDATE: Version 1.3.10 on Mar 27th, 2018 LATEST RELEASE OFFICIAL WEBSITE DOCUMENTATION Hey Mapcore! This is an open source vmt editor that aims to improve the tedious experience of editing text files with an easy to use UI and fast workflow. Dima Butemann did most of the heavy lifting involving the programming while I took care of the UI and bothered him about updating it. It has texture previews, can convert jpgs, pngs or tgas to vtfs (and move them to proper directories), verify vmts, features a batch vmt creation and has support for (most of) new parameters introduced in Nuke CS:GO update. Version 1.3.10 with all the required files can be found here: DOWNLOAD Alternatively, if any of you know Qt and C++ and would like to help with the project, you can check out our git repo at https://github.com/Gira-X/VMT-Editor Here is a quick video to demonstrate how fast making vmt files is: And converting textures to vtf: https://streamable.com/zlwed If it doesn't find any games you have to manually add them in the Manage games dialog: And browse to the main game directory: Also a shoutout to the creators of VTFLib (http://nemesis.thewavelength.net/) that provides the texture converting and preview functionality.56 points -

[CS:GO] de_highlands (WIP)
TECHNICKER and 52 others reacted to ElectroSheep for a topic
Hi guys, A few months ago, we tested de_highlands several times on the mapcore playtest. Now we want to share some progress even if we are far from the end. It's a defuse map setted in Scotland and we want to make a beta version as soon as we can.53 points -
Hello there! We've been working on this for a while now and we want to start sharing some progress. Everything is still very much WIP, but we'd be happy to get any and all C&C we can get. Some info about the map: it's being worked on by @BubkeZ, @Yanzl and myself. It is build from the 1.6 version that was released by BubkeZ a year ago (Youtube link). Originally, @FMPONE took the job to port this map to CS:GO, but due to Santorini he wasn't able to spend enough time to this project. Its original name was de_mirage2, but we've chosen to go with a different theme and name. Since then we've been hard at work and a lot has changed both visually and layout-wise. Now on to some pictures!52 points
-

[CS:GO] DE-VENOM
NikiOo and 51 others reacted to Jonny Phive for a topic
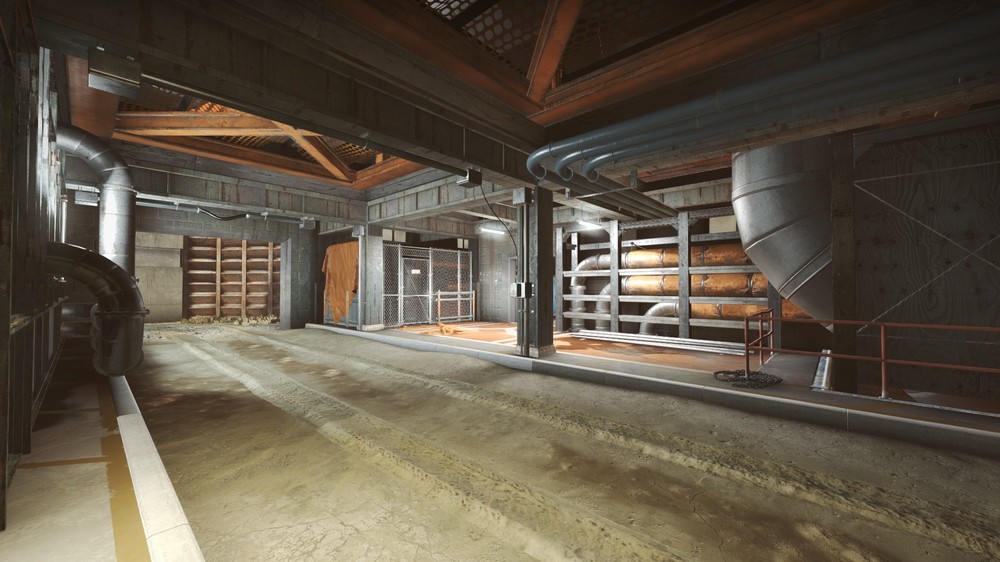
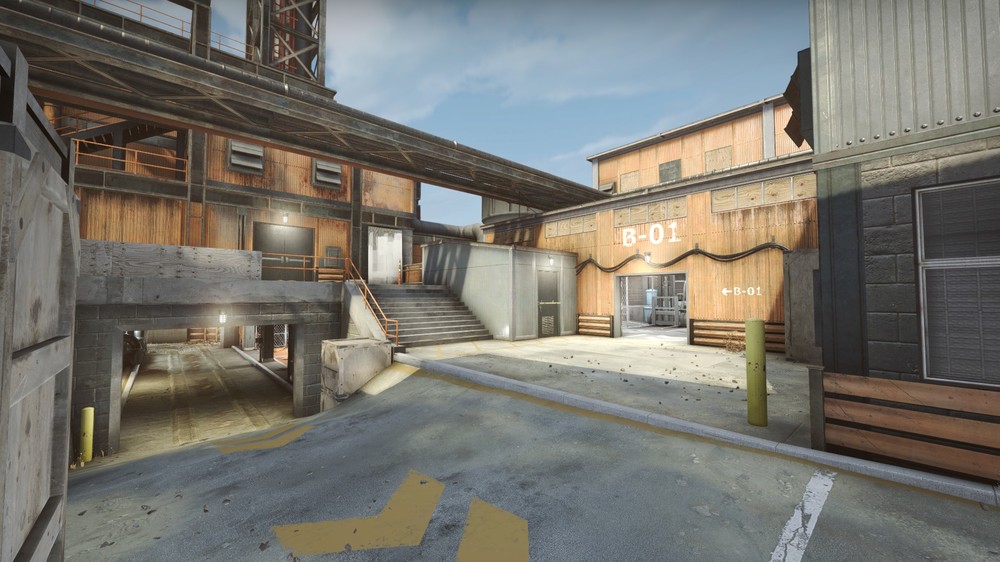
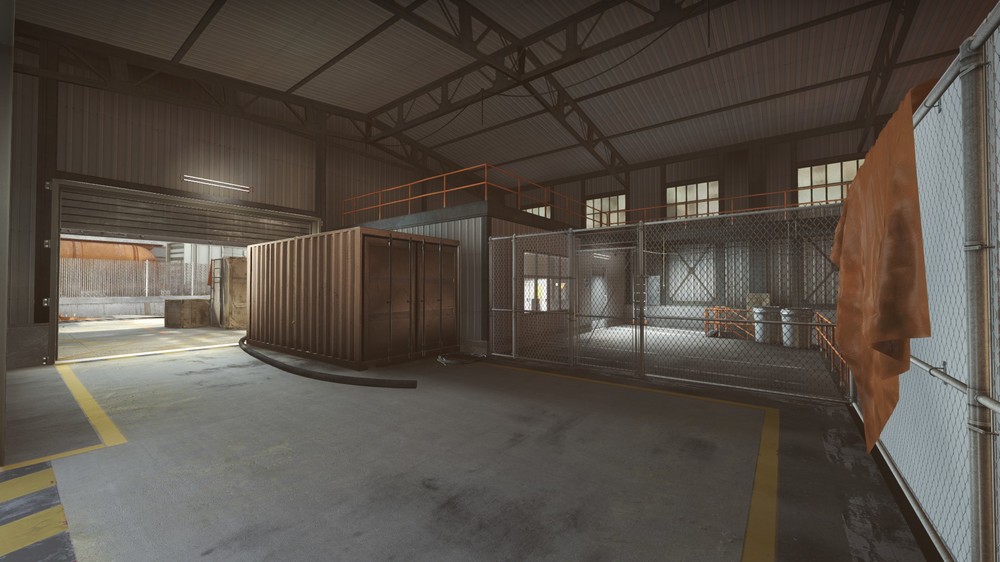
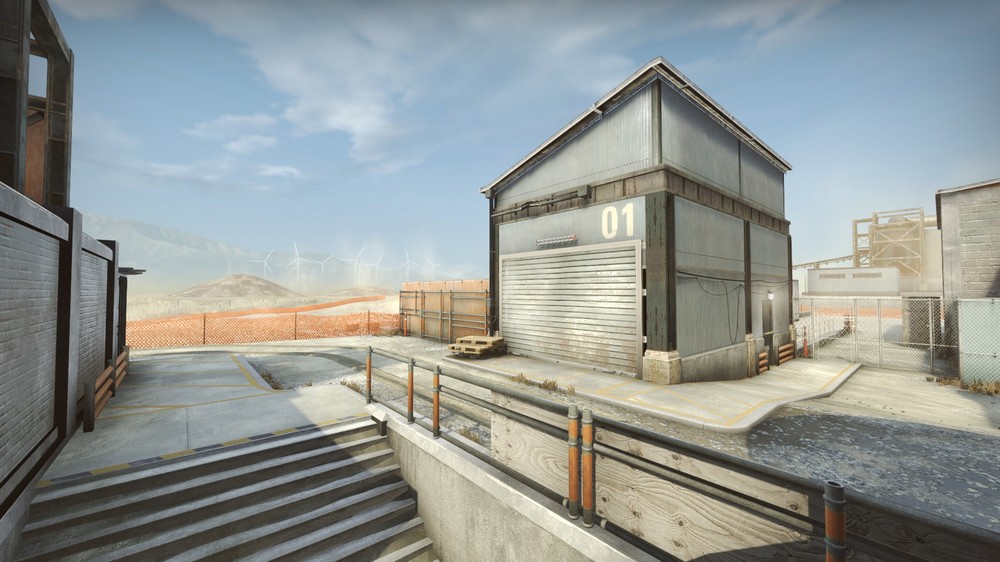
UPDATE April 15 2018: Here is the workshop link In the works for three and a half years, with the help of Rabbid Monkey (Spencer Rose), looking to release this passion project of mine very soon ™ ! Hidden deep within the jungle, a once-abandoned military base originally intent on destroying the world has been resurrected... Check out these snapshots into the new world of VENOM. Still WIP/Aplha & looking for feedback. Thanks to my brother for helping me make a badge/logo for the map


 52 points
 -
52 points
-
Hey guys, the map pretty much almost done, so here's one last update before release. Also to those that have played on the map, don't forget to submit your signatures (send a picture of your signature written with a thicker pen or with a tablet)51 points
-

Making Agency, the popular CS:GO map
Marbledemon and 50 others reacted to Rick_D for an article
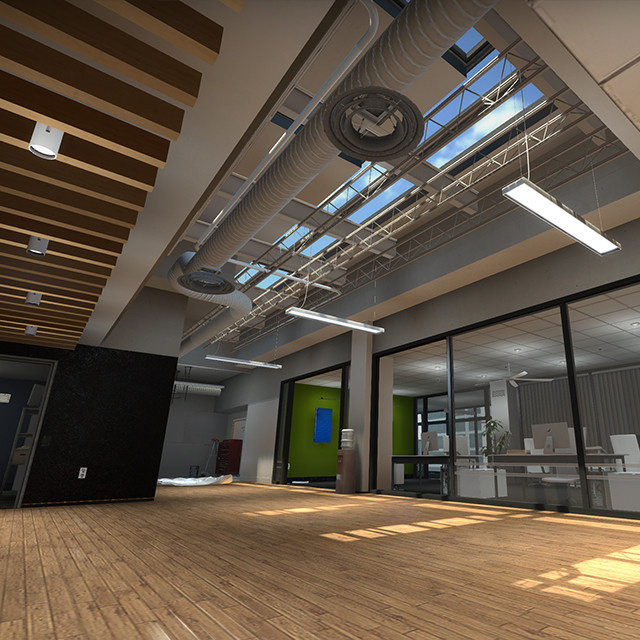 What is Agency?Just in case you have never heard of Counter Strike: Global Offensive, it's a hugely popular online FPS, successor to Counter Strike: Source and the original Counter Strike. The original came out in 1999 and the core gameplay has remained almost unchanged. Players are split into two teams and challenge each other in various game modes such as Bomb Defusal (one team has to plant and detonate the bomb while the other tries to stop them) and Hostage Rescue (one team must rescue the hostages whilst the other attempts to prevent that). The Bomb Defusal mode is by far the most popular, with maps designed with such detail that players can predict down to the second when another player is due to arrive in a certain area of the level. It's also the only mode played in competitive events and for huge prize money. This leaves the poor Hostage Rescue mode sitting on the sidelines twiddling it's thumbs and feeling a little rejected. In part this is because the Hostage Rescue mode is far more of a roleplaying experience, often with very poor odds of success for the team tasked with doing the rescuing. Often the levels are designed in such a way that the defending team has a large positional advantage, where simply staying-put will give them a good chance of winning. That's where we can start talking about Agency. Agency is a Hostage Rescue level, created as a collaboration between level designer Patrick Murphy, and myself doing the art. The basic idea being that Hostage Rescue could be just as precise and exciting as Bomb Defusal. It's been included in three official releases from the games creator, Valve, as part of their community level packs: Operation Bravo, Operation Phoenix and Operation Bloodhound. Phoenix being a community-voted choice, which was especially great to see that players enjoyed the style of gameplay and visuals that Agency brought with it. In this article I will go over the process of creating the art, from props to set dressing, texture creation and lighting, while maintaining a visually pleasing aesthetic and serving to enhance the gameplay. This isn't a postmortem but rather a walk-through of the various stages, hopefully to give some ideas to others, with lessons learned both positive and negative. Iteration from Whitebox to Final Starting out you should always have an idea of what you're going to create, even if it is quite vague, as it'll point you in the right direction for both creating architectural spaces and letting your imagination fill in the blanks as you build the basic shapes of the level. We knew we were going to build an office space, but style was leaning towards an older government building with red bricks and musty wood. As I started to put in some basic textures we decided it felt too bland, and similar to other levels in the game. In order to stand out and create something really interesting and intriguing that would entice players to want to explore the level we decided to modernize the space and use white as the primary colour - this would help players see each other more easily and provide a striking visual setting it apart from other levels. "Modern Office" is not exactly a style that has a single look, if you search for images you'll get back a lot of contrasting designs and ideas, trying to put every single one of those into a level would create a visual mess with no consistency. It's important to choose the right references for what you are building, something that looks cool in a single image or from a specific location might not fit into the theme of the level, and in a worst-case-scenario it might actually start to detract from the level as a whole. Trying to cram in as much content as possible simply makes your level feel less unified and jarring. Unfortunately when you are presented with so many fantastic designs and ideas it can be hard to pick out what is important. After settling on the location: a modern advertising agency's office, I broke down the needs of the level into a few different categories: Area SpecificGeneral UseOverall ThemeThe Area Specific content is "hero assets" for each location in the level. These are the things that help the player tell different areas apart from each other, a reception desk, a kitchen, a bathroom, etc. Assets that won't be used anywhere else except in their specific location. Examples of Area Specific Content The General Use content is the backbone of the building, it's wall sockets, ventilation tubes, sprinklers, desks and chairs. The things that could be used anywhere and would blend in to the background and not stand out unless you were specifically looking for them. Examples of General Use Content The Overall Theme content is what sells the theme of the level to players, advertising boards, company logos, large art installations and so on. These can be used everywhere but sparingly and should only be used as a subtle reminder to the player of where they are thematically. They shouldn't detract from the Area Specific content but should stand out more than the General Use content. This came in the form of abstract paintings, corporate logos, rotating advertisement panels and so on - things that would subtly tie the level together. Once these categories were laid out, searching through reference images became much simpler as you know what you need and only have to find an interesting design or detail that enhances a specific category. This isn't to say that everything was completely planned out or that development was flawless. Sticking to a plan only works until you open the editor, and if you try to force something you'll end up frustrated when it consistently fails to work. As an example we originally had the level set on the ground floor of a tall skyscraper. I spent a few weeks working on content for the ground but never really getting it to feel right within the theme of the level: the contrast between a dirty exterior street section and a spotless interior didn't feel right for the level, and felt a little too similar to another Counter Strike level. Patrick played around with some ideas and tried something I was afraid of: simply deleting everything I had done on the outside and adding an epic city vista. Instantly it felt right. The important thing to take away from this is that just because you have worked on something doesn't mean it's the right thing to be working on, and that getting input from other people with different ideas can vastly improve what you are working on. The first mockup of Agency's rooftop exterior The same space after an art pass Another incredibly important thing I realised is making use of modular assets. If you are going to duplicate something in your particular modelling software you should ask yourself: is this efficient? Chances are you're just making things harder to change later and locking yourself into a particular shape; eg: a walkway has a railing around it, you model the entire railing as a single object. Now if you need to change that walkway a month later you're going to have to go back and change your railing model. It's better to create a smaller tiling mesh that can be used multiple times, as often you'll find you can use that model in other areas and in different ways than you had initially intended. You're simply applying the concept of tiling textures to models, and in the process saving yourself a lot of time. A Believable Clean Art Style Creating a clean environment can often be more difficult and time consuming than a very dirty and cluttered one, simply because any mistakes are magnified by the lack of other objects to disguise them. A room with a single chair in the middle is going to end up with the focus being on that chair, if you fill that room with a hundred chairs you're going to be less concerned with the details of the chair and more worried about why someone would fill a room with a hundred chairs. In the modern office setting of Agency it would have made little sense to fill it with props and clutter, but a large empty space would just feel unfinished. A delicate balance of larger architectural shapes and smaller objects was needed. I like to think of this as functional art: it serves a purpose in the lore of the game world. Window and door frames, electrical sockets, thermostats and card swipes along with the maintenance apparatus of ventilation systems. These are the general use objects mentioned earlier, they fill out space and prevent an empty wall or ceiling from actually looking empty and at the same time they contribute to the believability of the level. It's important to think of the infrastructure of the building when placing these assets - if a wall has an air vent on it then the wall needs to be thick enough to support the ventilation pipes that feed it, Card swiping mechanisms need to be placed near doors at the correct height, electrical sockets should be placed logically in areas where they would be of use to the fictional inhabitants of the level and so on. Several examples of functional art details One of the most important things to do right when creating clean environments is to get the most out of the materials. It's not possible to cover every surface in dirt or decals, so the surfaces themselves become your way of showing detail. For Agency this was achieved by making liberal use of the phong shading techniques in the Source engine for models, and cubemaps for world textures. Almost all models in the level have some amount of phong shading, and although it doesn't produce a completely physically accurate result it can be used to create materials and surfaces that look relatively accurate. Simply by increasing or decreasing the intensity of the phong amount allowed for a vast majority of the levels surfaces to be rendered accurately. As I didn't need to have a lot of noisy detail in the materials due to the clean style I simply used a small phong texture as a mask for 75% of the models and let the lighting and general shapes of the models do the rest of the work. Simple phong shading to mimic real world materials As most of the surfaces had a single layer of material, ie paint or coloured metal, the phong shading could be completely even without breaking the illusion; however some of the dirtier surfaces such ventilation tubes and water pipes had several layers: a painted metal surface with area peeled away to reveal with metal underneath or a layer of dust. These had specific masks that would enhance the different materials, and showing wear and tear in the background assets added an extra layer of depth without compromising the clean style. Most of these textures were created with dDo, an excellent tool for quickly creating textures. I generally started with quite a dirty texture preset and toned down the details and noise until they were barely perceptible surface imperfections. Agency features probably close to 95% custom art, and that's a lot of work for a single person. Using dDo allowed me to make a lot of content relatively quickly, and kept it all visually consistent. The process of creating the assets with dDo was quite simple: first I modeled the basic ingame asset, then did a very quick and dirty placement of edge loops that allowed me to smooth the mesh and get a workable high poly. A very rough normal map was baked (along with a more solid ambient occlusion map), this rough normal map would never make it into the game, it was used purely for texturing with dDo. This rough-and-dirty technique was mostly used on the more general purpose assets that nobody would spend a lot of time looking at. For the objects that were in high traffic areas or that required finer detail a more robust normal map was created. Tiling textures used throughout the world were photo-sourced and tiled in Photoshop. A few examples worth pointing out are the plaster wall textures and the marble floors: The image above shows the ingame result, the diffuse texture, and the normal map of the standard plaster that is used throughout the level. The normal map was authored at 1024x1024 compared to the diffuse texture which was 512x512. I created several colour variations of the diffuse texture and for a very plain surface using a 1024x1024 diffuse didn't make much sense. The final touch was to add a subtle cubemap effect to bring out the normal map and add interesting coloured reflections in various areas. Another example is a marble floor used throughout the level. The normal map is unrealistic in that it portrays an uneven bumpy surface when in fact it is more likely to be uniformly flat. However to break up the reflections and add some visual interest to such a large and empty area I added a subtle bumpy normal map which warps the reflections, but is subtle enough that it doesn't get picked up by the lighting and actually appear like a lumpy mess. Good shading only gets you part of the way there, however. A poorly scaled model can break immersion instantly, especially when you are trying to create a believable real-world environment. There are tried-and-true metrics for Counter Strike so having a base to work from helped immensely, but these only give you a good starting point or a bounding box for your object. It's important to study real world reference and make sure your object is proportional to the world around it and also to itself. A unit in Hammer is an inch, so having wood that's 2 units thick, or a doorway that is 1.5m wide quickly makes things look wrong. Working with Designer Blockouts, and not Destroying Gameplay Agency was a collaboration, with Patrick doing the design work and me doing the visuals, this meant there was a lot of potential for overlap and working on the same areas, the potential for breaking things was huge. Often when you create things as an individual you don't have to worry about version control or stepping on someone else's toes, however when you work with other people either for pleasure or business you, as an artist, need to change your mindset. You are not creating a portfolio piece but rather something functional that has to withstand hundreds of hours of real people playing it. Your first role is to support the designer, and this benefits you as well. By creating the basic structures of the level: doorways, window frames, stairs, railings, cover objects etc, you are allowing them to work with the final assets and tweak gameplay according to those assets. Nothing needs to be finalized instantly, it's better to provide a rough mockup of the intended asset so the designer can play around with it and give feedback on the shape, size and silhouette. Once you are both confident it's going to work they can populate the level with these assets which saves you time in the long run, and once you finalize the model and textures they are going to be updated across the entire level without having to manually replace assets. It can be difficult to determine exactly when you should start an art pass, especially when a level is constantly evolving. Rather than sitting idly by whilst Patrick was ironing out the design of the level I started on the creation of a few visual test levels to explore materials, lighting and modular assets. Once the first iterations of Agency were created, with rough shapes for important cover and controlling lines-of-sight. I went in and created an art pass and altered many of these original gameplay ideas, simply experimenting with different shapes and designs for the rooms. We had a constant dialogue and never considered something finalized just because it was finished. Playtests would determine whether an idea was valid or not in a way that speculation can only hope for. The most important lesson learned during this process of constant iteration was that work is very rarely wasted, and it is far more important to stay true to a gameplay ideal than to have an area that looks interesting in a screenshot but utterly fails when players get their hands on it. A box is a box is a box, it is down to you as an artist to imagine how that box can be interpreted within the context of the environment. Initial art pass ideas for the central area (above) versus the end result (below) Initial art pass ideas for the reception (above) versus the end result (below) Initial art pass ideas for a hostage (above) versus the end result (below) Lighting An important part of any environment is the lighting. Too contrasted and moody and it becomes hard to identify players, too bright and monotone and it becomes boring and a strain on the eyes. For Agency I used a series of instanced lighting setups: a model to visualise the light source, a spot light to direct the light, and a sprite or light cone to add a visual effect around the light. Each light setup was unique to the type of model used for the actual light source, ie: all spotlights were identical, all fluorescent lights were identical etc. This meant I could change a single light and have the others update automatically, and always get an accurate result. Then it was just a case of placing these different types of lights where they logically made sense in the environment, and if an area was too dark an appropriate light source was added, and if an area was too bright lights could be moved around or removed entirely. This made it quite easy to light as everything was guided by reality, which has plenty of reference material, and had the side effect of helping to make the environment more believable. By using various colours on the floor and walls I could direct lights towards them and take advantage of the Source engine's excellent radiosity and spread interesting colours to nearby surfaces. In many areas the ceiling was opened up to reveal the sky and to let natural sunlight into the interior spaces, this was done to provide contrast to the electrical lights and to get extra radiosity bounces into the environment. Some areas had lights removed or toned down to allow other more important gameplay areas to stand out, for example the image below shows how the corridor here was darkened both by using darker textures and by using restrained lighting to make the room in the distance appear brighter as this is an area that enemy players will appear from. This could have been taken even further by possibly using emergency exit signs to add hints of colour to important gameplay areas and chokepoints. A consistent lighting language would have helped guide players during the first few times playing the level. There are some large open spaces that would have benefited from some coloured screens or lighting panels, or possibly making some of the larger glass surfaces tinted, to add a little extra colour and prevent such a monotone look whilst not being over-bearing or detracting from the realistic style of lighting I was aiming for. Final thoughts During the course of developing Agency I had a chance to learn a few things and come out the other end a, hopefully, better artist. So, what went well? The iteration process never had any hiccups, by using modular content and being prepared to discard ideas and art styles that weren't working we ended up with a better level. If we had tried to force the original idea of a ground-level government office we would have ended up with a completely different level, complete with underground parking lots and elevator shafts. Exciting stuff! The power of iteration cannot be understated, and understanding that a mockup or a blockout of a level is simply a temporary phase that doesn't represent the end result. Areas changed drastically between versions, sometimes due to design requirements, and sometimes of shifts in art style; but each version was better than the last, more refined and polished. What went less well? In direct contrast to the statement above, sometimes the iteration interfered with more important tasks. I got stuck on areas trying to get them to work instead of letting them sit for a while and returning to them later. I tried to force an idea for the exterior part of the level and it never felt right and consumed way too much time, when all it took was getting some outside perspective. Luckily during the process I learnt to trust designers when it comes to art, just because they might not build high poly meshes doesn't mean they aren't artistic. Another problem was building too much content completely unique for an area which meant when we inevitably changed things it became time consuming to shift assets around, and makes it less easy for others to re-use that content without creating an almost replica of the area it was designed for. These unique assets helped sell the realism of the level but made them harder to work with. Hopefully this has been interesting and insightful!51 points
 -
 An open map? Source engine, which is funnily a Quake engine on steroids (a bit of exaggeration but still), inherited the same limitations of its parents in terms of visibility calculations: BSP and PVS. This fact makes Source, as was Quake engine before, more suitable to rooms and hallways separated by portals where the BSP shines in all its glory. Inheritably, Source does not like large open maps where the PVS is of considerable size and the over-rendering is a real issue. If you work with Source engine, then you already know the importance of optimization in a large, detailed map. Optimization becomes even more imperative when the said map is open. What’s an open map? Good question. The word “open” is an umbrella term to denote any map that does not have traditional hallways and corridors that connect indoors to outdoors. The map is mostly large, outdoors with an unbroken skyline; in other words, the same stuff that source engine nightmares are made of in terms of PVS and BSP. In a traditional “hallway’d” map with twisted corridors leading to open areas followed by other hallways, and even if you “forgot” to place hints and areaportals, the geometry itself allows the engine to cut visleaves and limit visibility; granted the visleaves’ cuts will be subpar and messy and the PVS will be in excess, but still, the visibility and fps will be relatively under control. A twisted hallway is a remedy to long sight lines after all. In an open map, and without hallways and enough geometry to help the engine, the PVS risks to be huge and the whole map could be rendered at once from any point (over-rendering). We are talking here about a severe fps killer and a potential slideshow on a medium to low range computer. Source does not like over-rendering; I repeat, Source does not like over-rendering. I believe a screenshot should be welcome at this stage to illustrate an open map. I’ve chosen a nice medium-size map from CSGO to showcase the issue: de_stmarc. The shot is taken in Hammer obviously, and you can immediately see that the skybox is one big unbroken body from one edge of the map to the opposite one. This is the classic definition of open map. Let’s see this map in 2D view from the side. I have highlighted the skybox in blue so you could see the continuous sky body all over the map. Please note that an open map can have varying skybox shapes but I’ve chosen the simple and classic one to showcase my point where it is easier to see and visualize the concept of open map. In contrast, a “traditional” map will have several skyboxes, often not connected directly but rather through a system of indoor rooms or hallways, varying in size and shape. I will have my map de_forlorn as example here. I have also highlighted the skybox in blue and you can easily notice several skyboxes for CT spawn, T spawn, and Mid/bombsites. These skyboxes are not directly connected to each other but the areas related to them are linked on the lower levels through various indoor locations, some vast (like garage, tunnels…) and some small (like lab hallway…). If you are not that comfortable with source optimization or feel that certain terms are alien to you, then please read my previous optimization papers and articles before proceeding further in this article (Previous papers can be found here Source Engine Optimization roadmap). The necessary tools I’m not revealing a secret when I tell you that the same tools used to optimize any map in Source are exactly the same ones used for optimizing an open map. If you were expecting some magical additional tools, I’m sorry to bust your bubble. Since the tools are the same (nodraw, func_detail, props, hints, areaportals, occluders…), it is more about how to use them in open maps that makes all the difference. So, how to properly optimize an open map? Well, you could always pay me to do so for you (joking…not…maybe…I dunno!!) If the above option is off the table, then read on the rest of this article . Horizontal hints While in a traditional map one might get away without using horizontal hints, it is virtually impossible to skip them (pun intended) in an open map unless you want to witness single digit fps burning your eyes on the screen. They are of utmost importance to negate the "tall visleaves across the map" issue. In a traditional map, even if you bypass adding horizontal hints, the damage in fps will mostly be local since the skyboxes are not connected and areas are mostly autonomous in terms of PVS. In case of my map “Forlorn” and referring to the 2D diagram above, if I remove horizontal hints from CT spawn, then only this area will suffer from tall visleaves and over-rendering. Obviously, this is not cool in terms of optimization, but at least the effect will be somehow restricted to this area only. In the case of “Stmarc”, you can certainly see that not including horizontal hints will have tall visleaves seen from across the map as the skybox is one unit. The PVS will grow exponentially and the over-rendering will take its toll on the engine. Let’s move on to some screenshots and diagrams, shall we. This is our glorious open map in side view. The blue lines denote the skybox, the dark grey one is the ground, and the green rectangles represent solid regular world brushes such as building bases for example. The red starfish little-man-with-arms-wide-open is the player. The orange hollow rectangles denote the various visleaves that the engine would probably create in the map (most go from ground level to skybox level and this is what I refer to as “tall visleaf”). If you know your optimization, then you certainly remember that BSP relies on “visibility from a region” approach (for a refresher, please consult my papers Demystifying Source Engine Visleaves and Source Engine PVS - A Closer Look. This simply translates to the following: the player is in visleaf A and visleaf A has direct line of sight to visleaves B, C, D, E, F, and G. The PVS for A in this case would be stored as BCDEFG. Once the engine recognizes that the player is in A, and regardless of the exact position in A, it will proceed to render the whole PVS content. Everything in visleaves BCDEFG will be rendered even though the player is at the extreme end of A and has no line of sight to most of this content. You can immediately notice the extent of damage you will inflict on your open map if you neglect adding horizontal hints: excess PVS with additional useless content to be rendered at all times. Now that we established the importance of these horizontal hints in open maps, the question remains: where shall I put these hints? In the diagram above, the most logical places would be on top of the 3 green rectangles. We added 3 horizontal hints (H1, H2, H3) on top of the 3 regular brushes in our map (the hint face neatly resting on the top of the regular brush while other faces are textured with “skip”). This will create more visleaves as can be clearly seen in the above diagram, and vvis will take more time to calculate visibility due to the increased number of leaves and portals but this is done for the greater good of humanity your map’s fps. Now the player is in visleaf A1 and the PVS is reduced to (sit tight in your chair) A2, A3, A4, B1, B2, C3, C4, D1, E4, F3. On top of the nice result of a greatly reduced PVS (and therefore content to render), keep in mind that leaves A4, B2, C4, D1, E4, and F3 are mostly empty since they are way up touching the skybox. Some folks will start complaining and whining: what the hell dude, I don’t have 3 green rectangles in my map; where would I put my hints?? My answer would be: deal with it!! Joking aside, open maps will greatly differ in size, shape, geometry, and layout. What you need to do is choose 1 to 5 common height locations in your map where you would implement these hints. Medium maps with mostly uniform building heights can get away with 1 horizontal hint, while complex, large maps with various building heights can do with 4-5 hints. If your map has a hill made of displacements that separates 2 parts of the map, then it is also a candidate for horizontal hints. You just need to insert a nodraw regular world brush inside the displacement to be used as support for the horizontal hint (the same technique can be used if you have a big non-enterable hollow building made mostly of func_detail/props/displacements). Vertical/corner hints These might not come into play as much as their horizontal siblings, however they could see a growing potential use depending on the map’s layout, geometry tightness versus openness. I cannot go through all combinations of open maps obviously to show you how to lay vertical and corner hints; what I will do is choose one diagram representing a typical open map scenario with some scattered houses, streets, and surrounding fields. Once you see how I proceed with these hints, it will become a lot easier for you to implement them in your own map regardless of the differing geometry and layout. Here’s our typical map viewed from top with grey lines being map borders, green rectangles being houses (solid world brushes), and our tiny red player at the rightmost part of the map. The map has a main street that goes in the middle between houses but the player is not restricted to this path only. The diagram below shows how I would proceed with my hints for such setup. This is basically what you get when you give a 5-year-old some crayons. Seriously though, I just gave each hint a different color so you could discern them on the spot, otherwise it would be hard to tell where each one starts and ends. Most of these hints go from one side of the map to the other while going from ground level to skybox top; don’t be afraid of having big hints that cross your entire map. Notice that we have both straight vertical hints (shown from above in the diagram obviously) and corner hints; what I did is that I compartmentalized the map so wherever the player is, chances are they will have the least amount of leaves to render in the PVS (this is just a basic hint system and more fine tuning and additions could be done but you get the gist of it). To get more details on hint placement, please refer to my paper Hints about Hints - Practical guide on hint brushes placement Areaportals If your map has enterable buildings, then it is imperative to separate indoors from outdoors using areaportals; this is top priority. Make sure to slap an areaportal on each door, doorway, cellar door, window, roof opening, chimney, etc. that leads inside the house in question. What about outdoor areaportals? Good call. In an open map without much regular world brushes to maneuver, it could get very tricky to set up an outdoor areaportal system to separate areas. However, you should always strive to have one, even if it is one or two areaportals across the map. The reason is very simple: the view frustum culling effect, which, coupled with hints, will yield the best results in cutting visibility around the map. Continuing with our previous diagram, a simple outdoor areaportal system setup could be as follows (top view). This setup will make sure that the map is split into 4 areas and whenever you are in one of them as player, the view frustum culling effect will kick in to cull as much detail as possible from the other areas. Let me show you the setup from a side view to make it easier to visualize. This is the same areaportal that was closest to the player in the top down view diagram but this time viewed from the side. Unlike hints where it’s fine to have one big hint going across the map, for areaportals, it is best to have several smaller ones that tightly follow the contour of the geometry eventually forming one big areaportal system. Another possibility for outdoor areaportal system is to have a combination of vertical and horizontal (yes horizontal) areaportals. If your map is a village for example with a highly detailed central square where most of the action takes place, a potential system could be made of several vertical areaportals that sit in every entrance to the square from adjacent streets, and a horizontal areaportal that “seals” the area and works as a “roof”. For a practical guide on areaportals placement, please check out my article Practical guide on areaportals placement Props fade distance This is a really, really important tool when optimizing large open maps. In case you got distracted while I was making the announcement, I’ll go again: props fading is definitely vital when tackling open maps optimization. What you need to do is to set an aggressive fade distance for all trivial props that do not contribute to gameplay. Players will look closely at how detailed your map is when they check it out solo on the first run; however, when the action starts and the round is underway, adrenaline, focus, and tunnel vision kick in, and all the details become a blur. During an intense firefight, players will not notice small props and details up close, let alone at a distance. We need to use this to our advantage to fade props thus releasing engine overhead; a faded prop is not rendered anymore and engine resources will be freed and allocated elsewhere. Your map geometry will dictate the proper fade distances, but as a rough guideline, small props could have a fade distance anywhere from 800 to 1200 units (flower pot on a window sill, small bucket at the back door, a bottle on the sidewalk…), while medium props could do with 1400-1800 range (a shrub, a power box on the wall, an antenna on the roof, wood plank, gutter pipe, fire hydrant…). Be very careful though not to prematurely fade critical props used for cover or game tactics (car in the middle of the street, sandbags, stack of crates, dumpster on the sidewalk…). Cheap assets Many people forget about this technique which is more than needed when it comes to open maps that tend to have larger average PVS than traditional maps. I showcased in a previous article of mine the fps cost of cheap and expensive assets (Source FPS Cost of Cheap and Expensive Assets). Get in the habit of using the low-poly model version as well as the cheap texture version in the distant non-playable areas and the high unreachable areas where players won’t have much of close contact with the environment. Potential candidates could include a distant field, the unreachable opposite bank of a river, a garden behind hedges/walls, high rooftops, the 3D sky…). Fog/Far-z clip plane This technique, when correctly used, can provide a big boost to your frame rate as parts of the world beyond the opaque fog won’t be rendered at all. For this technique to work properly, your map should have a foggy/rainy/stormy/dusty/hazy/night setting (use as applicable) where a fully opaque fog won’t appear out of place. Obviously, if your map takes place in a sunny and clear day, this technique won’t work much and it will look inappropriate. Using this is simple: For example, if your map is set in a rainy and foggy day, you just need to set the fog end distance while having its density set to 1. You will then set the far-z clip plane to something slightly higher than the maximum fog distance (if the fog end distance is 8000 units for example, the far-z could be set to 8200). 3D skybox This is another good technique to reduce engine overhead and the cost of rendering. It is true that the 3D sky is used to expand the limits of your level and decorate its surrounding, however, since it is built at 1/16 scale (and expanded in-game), it is also a nice way to decrease rendering costs. Use this to your own advantage and relocate assets in the non-playable areas with limited player interaction to the 3D sky. One thing to keep in mind though, the 3D sky’s visleaf is rendered at all times on top of the PVS in the playable area. Do not go overboard and make an extra complex, highly expensive 3D sky or you would be defeating the purpose of this optimization technique. Occluders You thought I forgot about occluders? Not a chance as these are the big guns when it comes to large open maps with little world brushes to use for other optimization techniques. Let’s clear one thing first; if your map is made mostly of brushwork and displacements with little to no props, then there is absolutely no need to resort to occluders as they’d be totally useless in this case. Only when the map is loaded with models and props in an open setup with little regular world brushes that occluders come to play in force. To place occluders, you would search for areas where these occluders could make the most impact (low fps, high traffic, props abundance) since they run in real time and are expensive, otherwise their cost would outweigh their benefit in terms of frame rate variation. Remember that occluders rely on the player’s position and field of view relative to the occluder to calculate what gets culled. You need to place them in a way to maximize the number of props to be culled behind them when the player stands in front of these occluders. Let’s see some examples. We go back to our famous top down diagram; the occluder is dark blue placed on the left wall of the large house while the little black stars represent various props and models. The 2 diagonal black lines denote the player’s FOV relative to the occluder. Anything behind the occluder and within the view frustum will be culled. That’s nice; we are able to cull 4 props but is it enough? It is not optimal as we can still do better. What if we move the occluder to the right wall of the house? Much better if you ask me. 5 additional props were added to the culling process meaning less overhead and fewer resources to render for the engine. That is why I said earlier it is all about maximizing the impact of the occluder by placing it in a way relative to the player’s position that maximizes the number of culled models. Here’s another example (still top down view). The player has moved to the middle of the central street, and beyond that L-shaped house is an open field with a lot of props scattered around. One way to implement occluders is as showcased in the above diagram. Notice how I arranged 2 perpendicular occluders along the walls for the maximum occlusion effect as all of these props in the field are not rendered from that player location. Another way to arrange occluders in this case would be diagonally across the L-shaped house (split into 2 or 3 occluders if needed to accommodate the nearby geometry; they can be floating without the need to seal an area). If you’re feeling brave enough (you should be after reaching this far in this article), you could also add an extra occluder along the wall of the house to the left of the L-shaped house to further enhance the view frustum occlusion effect and cover more props in the field. The most common places to add occluders in open maps include a displacement hill that separates parts of the map, a hedge that stands between a street and a field full of props, a floating wall between a house garden and the street, the walls of a large house, the walls of a tall building, a ceiling when it separates multiple levels… To read more about occluders placement and cost, please consult my article Practical guide on occluders placement In conclusion The foundation of optimization in Source engine will be the same whether it is a traditional map or an open one. You will heavily rely on func_detail, nodraw, displacement, props… to achieve your goals but it is the way you use these tools in an open map that makes all the difference. One might get away with being a bit sloppy with optimization in a traditional map, however, make no mistake that an open map won’t be any forgiving if you decide to skip a beat in your optimization system. Talking about different open maps and formulating varying optimization systems for them could fill articles; I hope this article has shed enough light on the open maps optimization approach to let you easily design a system for your own map.50 points
 -
What I'm Working On
maxlevelboi and 49 others reacted to FMPONE for a topic
Hi guys So it's summertime for me. That means, I want to create 3 new maps! I'm creating this thread to keep account of these projects and because it should be a fun journey for all, like the voyage to Mordor to throw my free time into a burning inferno.!!! The screenshots are going to be honest. I've identified that I'm sometimes bad at showing people my in progress work because I want everything to look amazing and perfect and that's not gonna be the way these next few months go down. It's gonna get sloppy up in here. First, DE_SEASON: (a remake) Next is DE_GRACE, an original map: Don't Sue Me Pls: some placeholder art from Dear Esther in there. I also used some neotokyo/Agency stuff that's gonna get replaced. Third is a humble hostage map with only a rough concept in mind atm. Will begin when the other maps complete. Have a good day~50 points -
Mapcore is now holding a Counter-Strike: Global Offensive Mapping Contest for original 5v5 bomb defusal maps AND hostage-rescue maps, powered by FACEIT! Mapcore's Veteran Judges will be joined by CS:GO Guest Experts such as The WarOwl, Moses, Sadokist, DDK, James Bardolph, and Anders Blume! How to Enter Post a "Work In Progress" thread in Mapcore’s Official Event Forum! When you're ready, update your WIP thread with a link to your playable map's Gamebanana.com and/or Steam Workshop page. Your thread + playable map constitutes your entry to this contest! Submission Deadline Your playable map must be entered by NOVEMBER 30, 2017 at midnight Pacific Standard Time (PST). Judging Procedure Mapcore Judges FMPONE -- @FMPONE Puddy -- @puddpuddpudd TopHattWaffle -- @TopHattWaffle RZL - @RizzToTheIzzle Guest Experts Anders Blume -- @OnFireAnders James Bardolph -- @jamesbardolph Daniel "DDK" Kapadia -- @followddk Jason "Moses" O'Toole -- @OnFireMoses Matthew "Sadokist" Trivett -- @Sadokist WarOwl -- @TheWarOwl Mapcore will announce Contest Finalists on DECEMBER 10, 2017 To determine 10 Finalist maps, Mapcore Judges will rate Contest maps according to the following 100 point criteria, with all ratings tallied and given equal weight, and any ties broken by our Guest Experts: 40 points: Fun Factor (how well-designed is the map) 40 points: Visual/Thematic Presentation (how aesthetically sophisticated is the map) 20 points: Overall Polish (bug-free maps; maps with Soundscapes; maps which run smoothly; other determinations relating to quality) Finalist mappers will then have one month to make changes based on community feedback. (January 10th deadline to qualify for TOP 4 — submit by 11:59 PM EST) Top 4 Contest maps and the Grand Prize Winner will be declared in JANUARY, 2018 After one month has passed, Mapcore Judges and Guest Experts will rate every finalist map according to the same 100 point criteria above (Fun Factor, Visual/Thematic Presentation, Overall Polish), with all ratings tallied and given equal weight, and ties broken by Puddy. Mapcore will then declare the Top 4 Contest maps and our Grand Prize Winner! Contest Prizes Top 4 Contest Maps receive: Eternal Bragging Rights A Spotlight on Mapcore for 2 months (linking to each epic WIP thread) A Monetary Prize ($5,000 for First place; $3,000 for Second place; $1,500 for Third place; $500 for Fourth place) Map added to FACEIT platform for a time, playable for all users! **NEW** Special Valve prizes! (CS:GO/Valve merchandise) Contest Rules Entry into this Contest is free of charge for all. Your entry must be a playable map for the PC version of Counter-Strike: Global Offensive. Remakes (maps of the same name and design of an existing map released for public download), sequels (e.g. de_dust3), and spiritual successors (new name for an old layout) can NOT be entered. Maps that were under creation prior to the announcement of this Contest can be entered, as long as a complete map version (layout and art) has not been released for public download. Map entries must be submitted to the Steam Workshop and/or Gamebanana.com, as well as the Mapcore WIP forum before the deadline. Map authors are free to share their map on any other websites or services they wish, however the map must remain free to download. Multiple map entries are permitted, however each entry will be judged for its own particular quality. Map entries created by teams are permitted, however entrants will have to agree how to split any prizes awarded prior to prize claim and dispatch. Changes or updates to Workshop maps will not be considered after November 30, 2017 (for Top 10) and January 10, 2018 (for Top 4). Do NOT update your Workshop map after the deadline. Mapcore forum rules must be obeyed. All custom textures, models, etc. must be embedded into the map's .bsp file (FREE TUTORIAL AND TOOL). Assets must also comply with Steam Workshop guidelines. Map authors must be able to accept cash payments. Winners of hardware and physical products will be required to provide a valid shipping address. Judges, Experts, and individuals associated with organizing this contest CANNOT enter nor provide material assistance to map entrants. If a Finalist entry is disqualified due to violation of these rules, all applicable winnings will be directed to the next highest-rated map. Void where prohibited. Contest Eligibility 1. Participant eligibility: This Contest is open to any individual, or teams of individuals, provided they comply with the following: Participants must not be an Employee or Official Staff Member of the “Organizer” (Mapcore) or “Sponsors” (FACEIT). Participants must not have taken part in the preparation, judging, or official announcement of this Contest. Participants must not be a direct relative, spouse, direct employee, romantic partner or business partner of any of the above. 2. Legal Age: This Contest is open to any individuals who meet the above “participant eligibility” criteria. In the event that a participant who has not reached the legal age in his/her state wins one or more prizes, he/she must provide contact details for the legal guardian who will claim the prize(s). Prize Disclaimer FACEIT will be providing/sponsoring Prize revenue. Mapcore assumes no responsibility. THANK YOU to our AMAZING COMMUNITY! And to our INCREDIBLE Sponsor: https://twitter.com/FACEIT


 50 points
 -
A small thing a made for tf2.
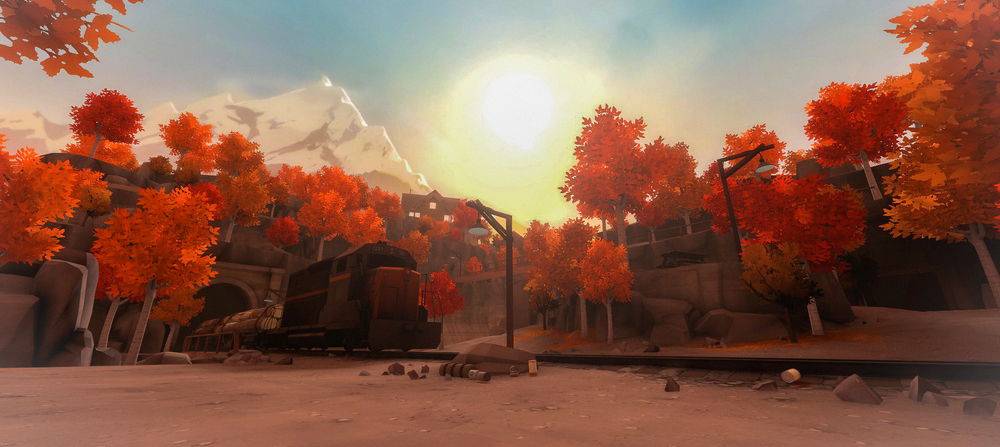 48 points
 -
Thought I'd share a bit of progress of the scene I'm currently working on. It will be for a character a friend at Yager is doing right now (you can follow his progress on http://www.polycount.com/forum/showthread.php?t=138052). Basically a little old kinda viking like church. Someone at Crytek will probably rig it and another dude from Yager will do some animations for a small ingame cutscene , VFX will be done by a chick from Yager, so we have a nice little colab going on. The VFX in the scene are mine though so far. Hope you like it.47 points
-
My entry for the Wingman contest. Still a bit rough in some places, but it's time to wrap it up for now. Workshop link Credits to @Yanzl for the majority of custom props and materials (and for some last-minute assistance in tweaking vmt's for nighttime setting) and to @Skybex and @Rick_D for a few other props and materials.46 points
-
GRAND PRIZE WINNERS Declared!
OrnateBaboon and 45 others reacted to FMPONE for a topic
At Mapcore, we believe in empowering the mapping community. We hold contests in order to reward and encourage mappers on their journey to success, and because we love maps. With an amazing partner in FACEIT, we expected unprecedented participation and enthusiasm from CS:GO mappers, and you all certainly delivered! We want to thank EVERYONE who participated for creating such wonderful levels, especially our Top 10 Finishers! It is now our privilege and honor to declare 4 Grand Finalist Maps. 4th Place Kaizen by Andre Valera, & Jakuza Prizes: Mapcore Spotlight Eternal Bragging Rights Added to Mapcore's FACEIT Hub Special Valve Prize $500! Steam Workshop: https://steamcommunity.com/sharedfiles/filedetails/?id=1216362919 3rd Place Studio by ZelZStorm, TanookiSuit3, & Hollandje Prizes: Mapcore Spotlight Eternal Bragging Rights Added to Mapcore's FACEIT Hub Special Valve Prize $1,500! Steam Workshop: https://steamcommunity.com/sharedfiles/filedetails/?id=1204635926 2nd Place Abbey by Lizard, & thewhaleman Prizes: Mapcore Spotlight Eternal Bragging Rights Added to Mapcore's FACEIT Hub Special Valve Prize $3,000! Steam Workshop: https://steamcommunity.com/sharedfiles/filedetails/?id=1215935299 GRAND PRIZE WINNER Biome by jd40 Prizes: Mapcore Spotlight Eternal Bragging Rights Added to Mapcore's FACEIT Hub Special Valve Prize $5,000! Steam Workshop: https://steamcommunity.com/sharedfiles/filedetails/?id=1224923995 ~~~Thanks to: our lovely guest judges, FACEIT for their incredible teamwork, and Valve for contributing to our prize pool. Last but not least, THANK YOU for making this another special 'Core event! "May Hurg guide you..."


.png.83790824cf4495319826db7d3d6da351.png) 46 points
46 points -

WIP in WIP, post your level screenshots!
OrnateBaboon and 45 others reacted to grapen for a topic
Doing some final polish on Scepter. Here's T-spawn.46 points -
Hi I'm working on a demolition map for the csmapmakers subreddit contest with @Quotingmc and @VIOLATION. We have a layout we are happy with and I started making models for it. Here are some screenshots : The main reason I'm posting my work is to ask @Yanzl and @'RZL an important question... Please, could we use some of your models from Resort? \o/ (I believe it's Yanzl's work :p) I'm asking because I'm not a 3D modeler, I can barely use the extrude thing in 3Ds Max, I press the Auto Smooth button and I apply a texture that in most cases I take from the de_nuke files... I really like your props, chairs, beds and other hotel stuff you made, it's super cute and clean and I could remake all of that but it would take me months and I don't have that much time to work the map. I plan to add some easter eggs in any case, little references to others maps / mappers and I plan to give some "lore" to the map by making a connection with other maps like cs_cruise and some official maps. Thank you in advance for your answer, it's ok if it's a "no", in any cases, I like your work guys!
.thumb.jpg.20acb8d880c57d5815c64b184cd2d950.jpg)
.thumb.jpg.c6669c8d79172841ee7cf16b543fdb29.jpg)
.thumb.jpg.abdf10a722f90c58fb7190042f56a150.jpg)
.thumb.jpg.13052f616409b74bd9b14c4fb4d4c66c.jpg)
.thumb.jpg.a6955f6e3090bc6d90112b8cab201f59.jpg)
.thumb.jpg.6aae453e940b194f991feac3ae388f29.jpg)
.thumb.jpg.06561ca65a244eecca8f227fe78342e6.jpg)
.thumb.jpg.fce53374c535b8635a54f2502429ccee.jpg)
.thumb.jpg.84ee4ae5bd23566bef12a2f2f6fd6b40.jpg)
.thumb.jpg.4c4e99640e1e0435a4eed5ade879b2cf.jpg)
.thumb.jpg.9fb6d722d0f47244c67c4b18c918b817.jpg)
.thumb.jpg.5ed4789a711c0b390f27414b8a4ecbb5.jpg)
 45 points
 -
Last Updated: 2017-04-14 (YY-MM-DD). 1.) How do I get started in 3D? There are many ways to get started, the quickest way is to actually start with a 3D program. There are many to choose from, such as: Maya (Has the most documentation available along with 3ds Max) 3ds Max (Has the most documentation available along with Maya) Cinema 4D (Mostly popular for the movie industry rather than the games industry) Modo (Personal favorite) Blender (Free) If your only goal is to create assets for the source engine, you would have the easiest time in 3ds max using wallworm tools. Your second option would either be Blender, because it's free and has alright source tools or Modo (me and tomm would have to get you up to speed). Results in other programs may wary! Once you obtain a 3D Package of your personal choice (I would recommend you to trial a few, get a feel for them). The next step is to start with tutorials or lessons. There are many on the internet, they range from text and image tutorials to video tutorials. You aren't going to find a tutorial for everything out there, but most will explain techniques that you need to adapt in order for you to achieve whatever final result you want. 2.) Wow! That's a lot of programs! Which one is best? I heard ______ is best. You heard wrong, while you can argue that one program does certain tasks better than another program, there is no one program to rule them all. It has and always will be the skill level of the artist. Which program you choose is solely dependent on your own personal taste and which aspect of the 3D industry you want to be involved in. 3ds Max and Maya are the most hyped throughout the ages and so therefore the most used, and therefore the most documentation available online. The interfaces are like a rocket ship and have a steep learning curve, but there isn't any 3D program you can't learn if you take the time to use it and follow some tutorials. If you're starting out, I would recommend starting with a generalist package and not a specialized one. 3.) Wow, Generalized vs Specialized? How do I know? A generalized package like 3ds Max, Maya, Softimage are packages that let you model, render, animate, texture, and create dynamics all within the same application. They don't require third party plugins or applications to add another basic feature, like a renderer or animation tools. However you can get plugins for these apps to enhance their features. 4.) Ooooh Zbrush, I see so much awesome work from that software, I'm gonna start there! No, you're getting ahead of yourself. You should start learning about basic modeling & important fundamentals before jumping into Zbrush. Zbrush is a great program for advanced users to sculpt in additional detail to their existing models, or to prototype models quickly by sculpting them out. It is not a good idea to get into Zbrush when you're not very familiar with general 3D concepts 5.) Okay, I see I'm not very good at this stuff, can you model ______ for me? No, anybody with any decent skill on this forum does this work for a living or for some kind of gain (mostly). It's important to do what everyone else did, to teach yourself how to fish. Someone who is feeling generous or has the time might help you out, but don't expect the person to follow your every order and make an amazing piece of work, you get what you pay for. 6.) But it's too hard, isn't there any easy button? I don't feel motivated. No, like all things it takes time and effort to master a program, practice makes perfect and playing around with the interface will get the shortcuts ingrained into your muscle memory. Everyone has been through creative block & slumps, and has had their ups and downs. Keep on grinding and you will become a professional twerker. 7.) So which program is the easiest to learn? No, you shouldn't learn a program. You should focus on learning techniques. When you master a technique the program becomes nothing more than a tool to achieve your desired results. As said before 3ds Max and Maya have the most documentation but you should look at learning how to model and the right techniques instead of "What button does X". You can get UI information from the program's help files. F1 and Google are your friends. 8.) "So, what do studios look for when hiring if I don't know program ______ won't I get turned down?" When a studio judges your demo reel and resume they have an order of priority. Quality of Work Versatility Experience Program skills 9.) So studios don't care what program I use? Why do they care about versatility? Except for Animators who are pretty much exempt from most rules of 3D, most studios want people who can perform multiple tasks instead of just a specialized one. They want modelers who can also texture, they want riggers who can also do dynamics, they want lighters who can also texture. It's okay to be specialized in one area, but it doesn't hurt to be versatile, it will always keep you employed. When a studio looks at your program skills they do often look to see if you have experience in their preferred in house package, but MANY times you're going to get a studio that has added their own tools and pipeline so it wouldn't matter what program you know as long as your skills are good. If you know techniques you can pretty much pickup any 3D package in a matter of days. Of course there are some that are hard set that you know program ________ but for the most part what package you know is not that important. (Yes even you Blenderfags can get a job in a studio if you know what you're doing.) 10.) If you want to get into game asset creation, your three primary focus of interests are: Modeling Texturing Animation Low poly modeling is an art in itself, trying to get as much detail with as few polys as possible takes some practice, there is no formula for this. You create a low poly model and use techniques such as good UV textures and normal maps to enhance the look of the model in the game engine. A great place to start for game asset creation: http://www.poopinmymouth.com/tutorial/tutorial.htm Animating for games is pretty much the same as for movies, except that your model has a higher chance of deforming badly and you may not have as much control over your rig. Still the basic concepts of animation will always apply. 11.) Huge list of links. Very handy! 12.) How $details can help your CS:GO models / textures What are $details? $detail is a parameter you can add to your .vmt to add further detail to your texture / model's texture How to find the usable $details folder Use a program called GFCScape or VIDE (I will be using VIDE). In VIDE, under tools I will select the "Package Viewer". With the Package Viewer I will open a .vpk file called pak01_dir (found in C:\Program Files (x86)\Steam\steamapps\common\Counter-Strike Global Offensive\csgo) Now I will click the "Search" icon and search for "detail". Press enter and scroll down until you find the following: Open this folder and voila, you found quite a few details. This is not all of them, it is hard to track down all of them. A good way is opening up Valve's own .vmt's, like the Nuke ones, and you will run into nice $details for various metals that can really change the game for your model / texture, or keep on hunting in VIDE / GFCScape. You can also create custom detail textures, basically a detail is a grayscale texture that will be overlayed on top of the current work you apply it to. Enough talking, let's give some examples of what they can do! Here, my model's texture is just a flat color so you can easily observe how the $details affect the surface. Here are the parameters for the details I used in the image above: 1) $detail metal/hr_metal/hr_metal_detail_001 2) $detail detail/dt_carpet1 3) $detail detail/dt_wood 4) $detail metal/hr_metal/hr_metal_detail_002 The parameters I use to control my $detail is the following: $detail - Specifies the location of the detail you want to use. $detailscale - Controls the scale of your detail. $detailblendfactor - Controls the opacity of your detail.0 Here is an example .vmt for a model: $basetexture "models/de_transit/cube_preview" $detail detail/dt_carpet1 $detailscale 3 $detailblendfactor 0.5 Valve use this a lot in their models and textures, and you should too. They can range from being very subtle eye-candy, or making sure your diffuse looks like galvanized metal. 13.) Counter-Strike: Global Offensive When it comes to CS:GO, Valve's Developer Wiki will be your new Bible. Most questions you have, can be answered by this wiki. Stop being lazy. A lot of this is straight outta compton Valve’s Developer Wiki. 13. B) Terminology QC, VTF, VMT, SMD, OBJ, FBX What is a “.qc” ? A “.qc” file is a text-file script which controls the process of compiling SMDs into a binary model that can be loaded into a game. The extension stands for Quake C, the programming and scripting language from which the Valve Data Format was originally derived. A QC configures the model's location and name, which SMD files are used to provide geometry, collision meshes and animations, how the model reacts when shot, and so on. What is a “.vtf” ? A texture is a .vtf (“Valve Texture File”) that is the proprietary texture format used by the Source engine. VTF files are generally referenced in a Material instead of being accessed directly, which allows re-use in different ways. Both textures and materials are stored in subfolders of game_dir/materials/. What is a “.vmt” ? A material is a .vmt ("Valve Material Type") text file that defines a two-dimensional surface. It contains all of the information needed for Source to simulate the surface visually, aurally, and physically. What is a “.smd” ? The Studiomdl Data file format (.smd) stores 3D models in ASCII for analysis and compilation by studiomdl. SMD files are usually generated by an SMD export plug-in for a given model editor package like the Wallworm Model Tools for 3ds Max What is a “.obj” ? A .obj is a geometry definition file format first developed by Wavefront Technologies. For the most part it is a universally accepted format. The .obj file format is a simple data-format that represents 3D geometry alone — namely, the position of each vertex, the UV position of each texture coordinate vertex, vertex normals, and the faces that make each polygon defined as a list of vertices, and texture vertices. Vertices are stored in a counter-clockwise order by default, making explicit declaration of face normals unnecessary. OBJ coordinates have no units, but OBJ files can contain scale information in a human readable comment line. Basically it’s a format for your 3D model that you are going to use when compiling your model for the Source Engine, if not an .obj format then an .fbx, .smd or .dmx format. What is a “.fbx” ? A .fbx (Filmbox) is a proprietary file format (.fbx) developed by Kaydara and owned by Autodesk since 2006. It is used to provide interoperability between digital content creation applications. Does mostly the same thing an .obj does. 13. C) Models A model is a collection of points, or vertices, that form a 3D shape known as a mesh. The gaps between the points are usually filled with polygons, and these polygons are usually covered with a material. Models are used for almost every 3D object in Source that isn't a part of a map's underlying brush geometry. NPCs, physics objects, guns, and sometimes even buildings are all models. Models are created in external modelling packages that are not part of the Source SDK. The SDK tool studiomdl is used to compile files exported from a modelling package into the binary MDL format that Source understands. Your collision model(s) have to be made up of convex pieces, that together match the shape of your model as well as they can. They also have to be 100% smooth. You can either create your collision models piece by piece manually or find plugins to use for your piece of software. How do I export models into the game? You have several options assuming you’ve already created a model in a 3d package of your choice. CS:GO supports various formats: SMD, DMX, OBJ and FBX The easiest way would be to export your mesh into OBJ or FBX since most of the 3D packages natively support these formats and there’s really no need for a third party tool (although it does make the process much easier). OBJ format has some limitations you should be aware of: only 1 UV channel. (With the recent update CS:GO supports the usage of two UV channels which is only achievable with an FBX format) can’t use it for collision hulls/meshes. can’t export bones/no animation support. Now I’ll explain the most basic way to get your model into the game without the use a 3rd party tool. First create a QC file, here’s an example testcube.qc: $modelname "de_yourmap\testcube.mdl" $body mybody "testcube.fbx" (As said previously this format can also be an OBJ, SMD or DMX. Don't include this in the QC!) $staticprop $surfaceprop default $cdmaterials "models\de_yourmap" $sequence idle "testcube.fbx" Now create a batch file, let’s call it compile.bat. And paste in the following: "C:\Program Files (x86)\Steam\steamapps\common\Counter-Strike Global Offensive\bin\studiomdl.exe" -game "C:\Program Files (x86)\Steam\steamapps\common\Counter-Strike Global Offensive\csgo" %1 pause We can now drag and drop our QC directly on our newly created batch file and let it do the compiling process. You can also use Guistudiomdl or Crowbar rather than creating your own batch files, these provide a lot more functionality than a simple batch file. If you can’t see any errors then you should be able to launch HLMV and browse to your compiled model, in this case you would find it inside a directory called “de_yourmap” as specified in the example QC above. My model is pitch black, what’s going on? In the picture above, we’re missing the material (.vmt) since we haven’t created it yet. So go ahead and create a basic material file inside: <path to your csgo installation>\csgo\materials\models\de_yourmap Call it testmaterial.vmt and paste in the following: "VertexlitGeneric" { $basetexture models/de_yourmap/testmaterial (Path to your .VTF) $surfaceprop concrete } Assuming you have your texture ready, save it as testmaterial.vtf and you should be done. That’s pretty cool, but it has no collisions, wat do? Since our model is just a very basic convex shape (a revolutionary cube) we can use it as a collision mesh as well. For anything more complex you’d have to make a proper separate collision mesh. so the resulting QC file will look like this $modelname "de_yourmap\testcube.mdl" $body mybody "testcube.fbx" $staticprop $surfaceprop default $cdmaterials "models\de_yourmap" $sequence idle "testcube.fbx" $collisionmodel "testcube.fbx" Now compile again and enjoy the result after all this hard work. Well that’s beautiful, look at our final model! Alternatively you can avoid all of this long, hard work by using an exporter. Known exporters Maya - MESA 3ds Max - Wallworm Cinema 4D - I/Ogre Modo - Modog Blender - Blender Source Tools Special thanks to @tomm for helping me with the new edition of this handy little guide. Happy git gudding.45 points
-
[CS:GO] DE_Breach - Released!
OrnateBaboon and 44 others reacted to Yanzl for a topic
Update! Here's how it looks now:45 points -
[CS:GO] de_highlands (WIP)
goong and 43 others reacted to ElectroSheep for a topic
Hello guys Well I wanted to wait a bit longer to have more to show but as it's progressing very slowly, here are some shots from almost finished areas. I spent last month to update the art with better texture work and detail, and also optimisation (if combine props works...) hope you will like it. Before : Now : Before : Now : Before : Now : (woops a nodraw wall) And some other stuff I will be able to show more soon !44 points -

Push & Pull - The art of guiding players through an environment
Eric_Chocholacek and 43 others reacted to Corwin for a topic
Hey all, Because my busy life doesn't allow much time for side projects and thus doesn't satisfy the urge of doing something constructive, I wrote a multi-parts article about guiding players through environments (a subject that fascinates me greatly.) Push & Pull - The art of guiding players through an environment 1. Introduction 2. Facilitate mental mapping 3. Influence via composition 4. Lure with affordance 5. Drive with goals & narrative 6. Communicate through a language 7. Direct with restrictions & cameras 8. Show with UI elements & cut-scenes 9. Conclusion I intend to tweak and improve the article if needed so I'd be very interested to hear your thoughts, criticism and feedback! Hope you like it! 44 points
 -
Some stuff I've been working on as of late, the first two images being for my in-dev mod, Desolation. Sorry for having so many images44 points
-
Hello everyone ! I think it is a good time to post some screenshots from my newest csgo project that I'm working on with @jakuza. He already made some models and materials that I used in the listed locations. More to come in next passes, County is a map that features everything that comes to mind when typical european thinks about rural part of the USA. It is a danger zone map that features variety of locations you would normally see in rural cities. What I tried to do was to tie these location with some story as well as their placement on the map. I really wanted to avoid 'random structures scattered across the map' feeling some of the community made maps have. First art pass is mostly done in most of the locations. In upcoming weeks I will focus on Motel and Quarry locations which are not shown here in this post. List of locations with a lot of creenshots (a lot of screenshots actually?) Church: Police station: Sawmill: Farm: \ Trailerpark: Haunted house: Creek: More to come!
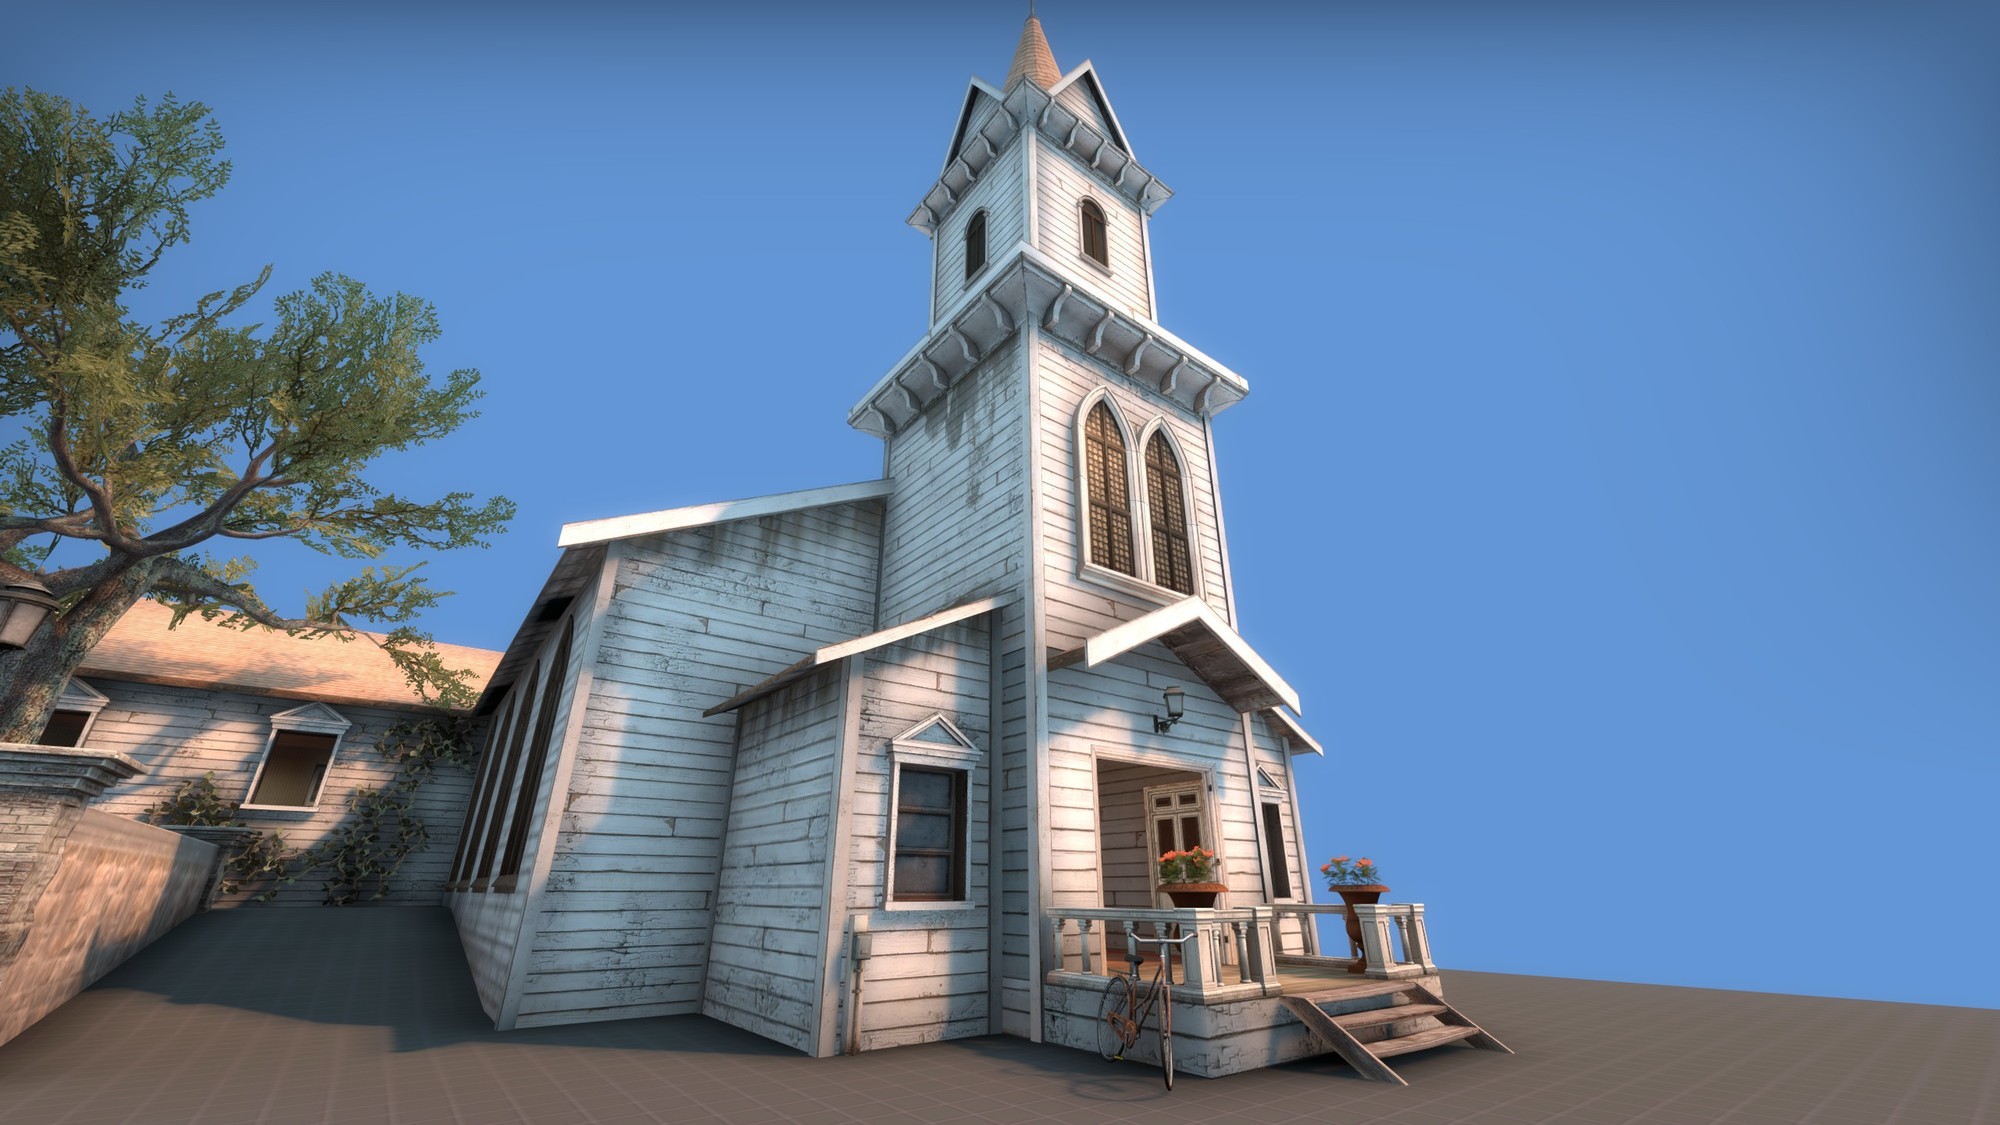


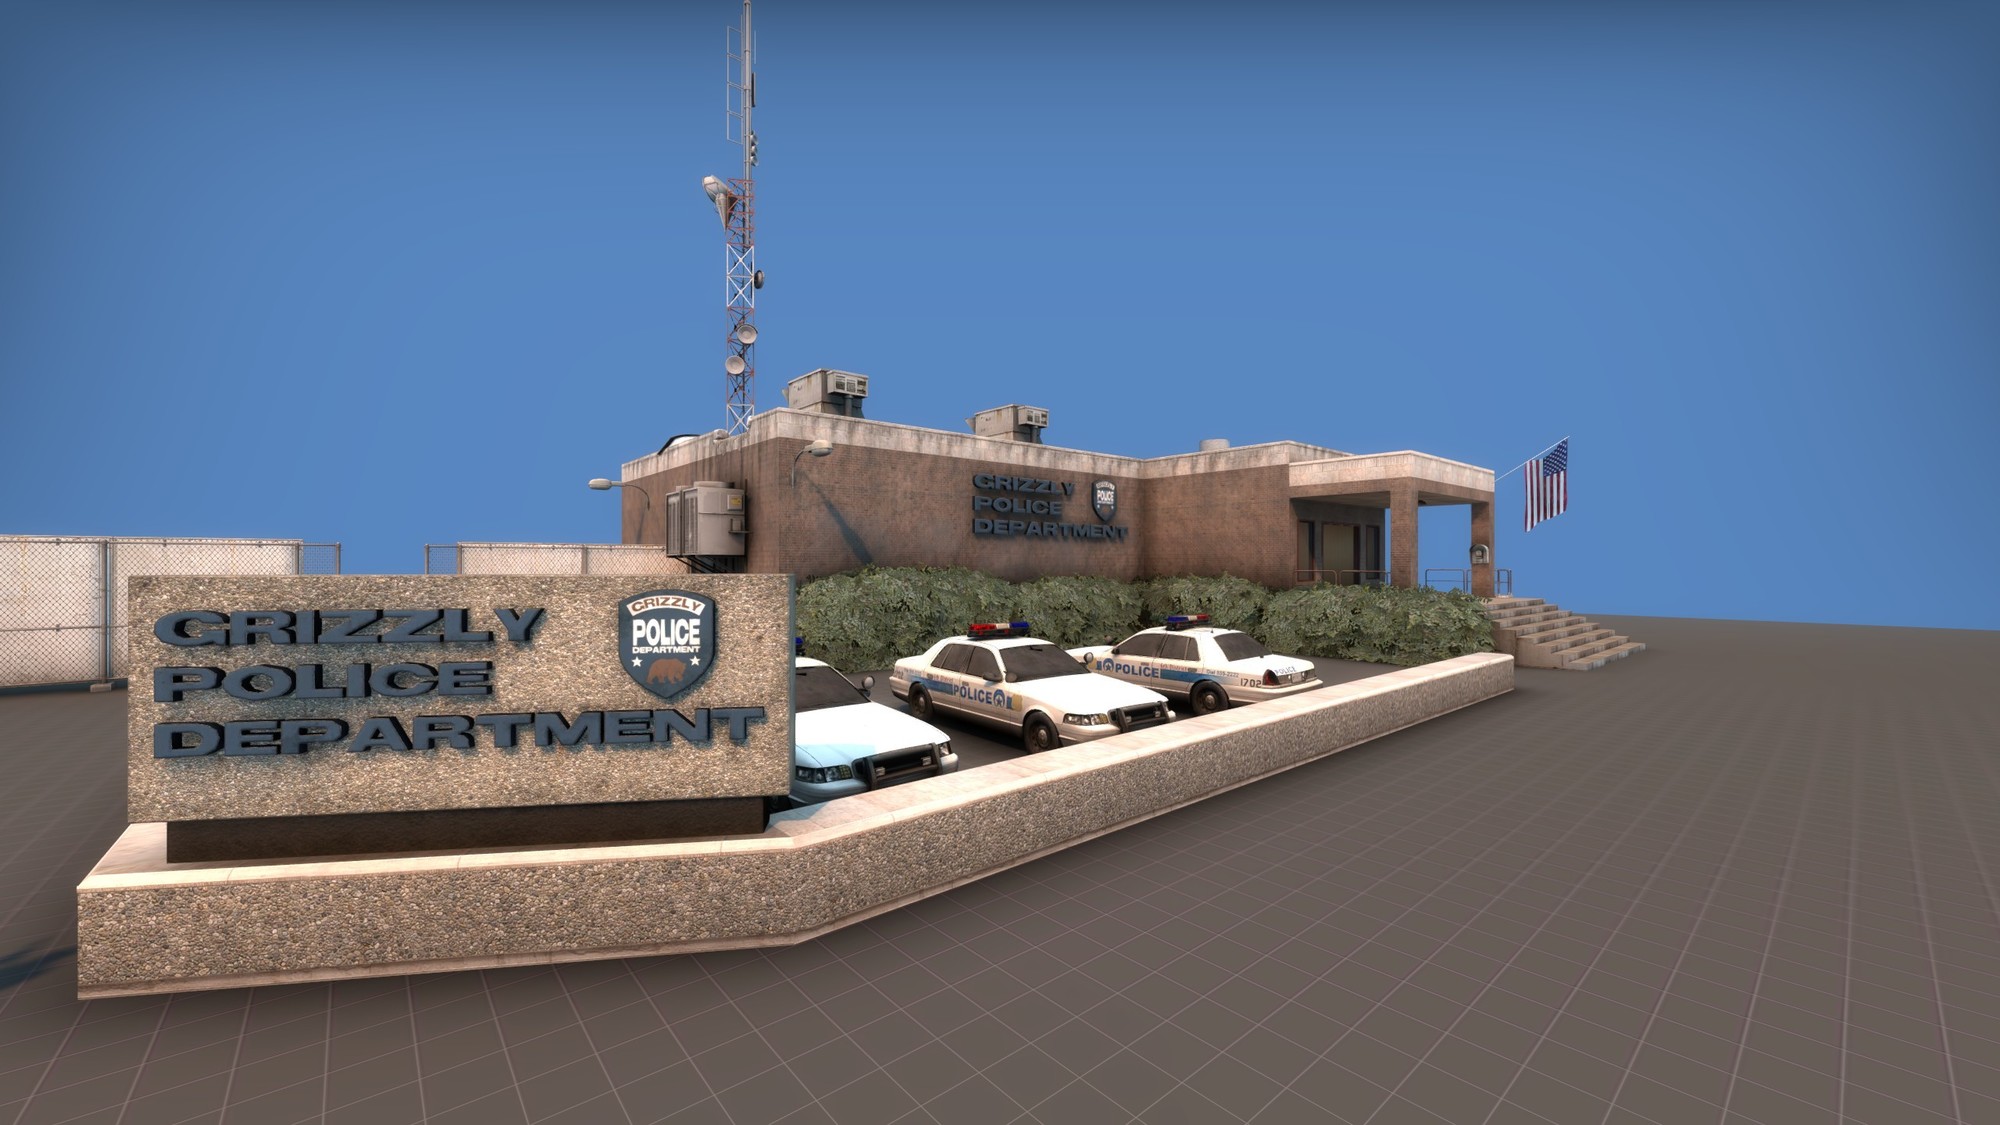

 43 points
 -
Hello all! This post is a little late on Mapcore because I have been moving and working on other projects also but I still wanted to share the release of Engage with the Mapcorians for who missed the release on the workshop. Two years ago BubkeZ and RZL came to me and asked if I wanted to work with them on a layout BubkeZ created in 2010 for CS 1.6 called de_engage and obviously I said yes. The three of us then started to look at this old layout and discussed what needed to change to make it viable for CS:GO and improve on the original design. RZL then made the first blockout with all the changes we discussed and handed the greybox level to me and I took it from there. The result: ENGAGE WORKSHOP PAGE


 43 points
 -
A bomb defusal map set in an undisclosed location in Iceland. Unsettling evidence discovered by researchers will foil the terrorists plan for world domination. Unless they can blow it all up... The level is designed in a way that it is easy to learn but hard to master. It is compact but offers a lot of depth with clever use of effective elevation changes, boost spots, lines of sight and rigorously tested timings -- ultimately allowing players from both teams to look for encounters that suit their playstyle in a balanced and uniquely beautiful environment. By @Yanzl, @'RZL and @Oliver aka The Basalty Boys DOWNLOAD: https://steamcommunity.com/sharedfiles/filedetails/?id=198438338343 points
-
cs_neightborhood ct spawn north
 43 points
 -
Some progress pics. There's still space on the wall of fame, just hit me up if you want to be a part of it.43 points
-
WIP in WIP, post your level screenshots!
[N]awbie and 42 others reacted to Jonny Phive for a topic
Hi friends! Hope all is well! Been working on this project off and on for about ~3 years. Trying to be more open and stay motivated to get it pass the finish line. Its my love letter to classic spy films. All very WIP at the moment.. -jonny

 43 points
 -
The dos and don’ts of CS:GO level design - a guide to assist you crafting a well working competitive layout for CS:GO ________________________________________________ New update (27th June 2019): The dos and donts of csgo level design - updated 2019-06-27.pdf Steam version of the guide here: https://steamcommunity.com/sharedfiles/filedetails/?id=1110438811 ________________________________________________ Original Post:42 points
-

de_zoo
TECHNICKER and 41 others reacted to Squad for a topic
de_zoo by Squad and Yanzl A bomb defusal map set inside a San Franciscan zoo. Terrorists are on a mission to bring mayhem to the Bay Area Zoo. ----------------- Models and textures by Yanzl. Additional models and textures by Rick_D ( editpoly.net ) and Skybex ( skybex.com ). Special thanks to everyone that in one way or another contributed to this level. Download and support the map at the Workshop link Thanks!42 points -
42 points
-
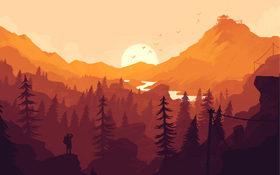 The following article contains quotes from interviews with Todd Papy, Design Director at Cloud Imperium Games, Geoffrey Smith, Lead Game Designer at Respawn Entertainment, Paul Haynes, Lead Level Designer at Deep Silver Dambuster Studios and Sten Huebler, Senior Level Designer at The Coalition. A big heartfelt 'thank you' goes out to these guys who took the time out of their busy schedules to answer my questions! On the MapCore.org forums many amateur level designers ask for feedback on their portfolios or for advice on how to break into the games industry. But once you have signed your first contract and you have your foot in the door you will realize that this step marks merely the beginning of your journey. It is a winding path with many diverging branches and without much information available on the road ahead. This is the reason why I decided to interview professional designers in Senior, Lead or Director positions to share their personal experiences and advice with others trying to navigate this field. It is worth mentioning that the questions were not selected and phrased with the goal in mind to compile a ‘how to get promoted fast’ guide. Instead I wanted to give level designers insights into the careers of others - who have stood at the same crossroads before - in hopes that they get the information to pick the path that is right for them. Hands-On VS Management At the beginning of his career, Todd Papy started out as a “designer/environment artist” – a job title that dates back to times when team sizes were much smaller and one person could wear both hats at the same time. As the project complexity and team size grew, he specialized in level design at SONY Santa Monica and worked on the God of War titles. During his time there he moved up the ranks to Lead Level Designer, Design Director and eventually Game Director. From level design to directing a game - a career thanks to careful long-term planning and preparation? “It wasn’t even on my radar” says Todd. “I just wanted to build a game with the team and soak up as much information from the people around me as possible.” So how do level designers feel who step into positions where the majority of their daily work suddenly consists of managing people and processes? Do they regret not doing enough hands-on-work anymore? Todd says he misses building and crafting something with his hands, but instead of going back to his roots, he decided to look at the issue from a fresh perspective: “As a Lead or Director, your personal daily and weekly satisfaction changes from pride in what you accomplished to pride in what the team has accomplished.“ Today Todd is designing the universe of 'Star Citizen' as Design Director at Cloud Imperium Games. Geoffrey Smith - who created some of the most popular multiplayer maps in the Call of Duty and Titanfall series and who is now Lead of the ‘Multiplayer Geometry’ team at Respawn Entertainment - says his output of levels remains unchanged thus far, but he can “easily see how being so tied up with managing would cut into someone's hands-on work”. Geoffrey calls for companies to provide the necessary training to employees new to management positions: “Managing people and projects is hard work and is normally a vastly different skill set than most of us in games have. Maybe that is why our industry has such problems with meeting deadlines and shipping bug-free games. A lot of guys work for a long time in their respective disciplines and after many years they get moved into a lead position. They certainly know their craft well enough to teach new guys but managing those guys and scheduling would be something brand new to them. Companies need to understand this and get them the training they need to be successful.” At Respawn Entertainment, the studio provides its department leads with training seminars, which helps the staff immensely, according to Geoffrey. Sten Huebler, currently working as a Senior Level Designer at Microsoft-owned The Coalition, in Vancouver, says he definitely missed the hands-on work when he worked in a Lead capacity on 'Crysis' and 'Crysis 2': “I was longing for a more direct creative outlet again. That is why coming to The Coalition and working on Gears of War 4, I really wanted to be hands on again.” To Sten it was the right move because he enjoyed working directly on many of the levels in the game’s campaign and could then experience his fruit of labour with others close to him: "After Gears 4 shipped, playing through the campaign, through my levels with my brother in co-op was a blast and a highlight of my career. He actually still lives in Germany. Being able to reconnect with him, on the other side of globe, playing a game together I worked on...So cool!" 'Gears of War 4' developed by The Coaliation and published by Microsoft Studios Paul Haynes, Lead Level Designer at Deep Silver Dambuster Studios, encourages designers to negotiate the amount of organizational tasks and hands-on work before being promoted into a position that makes you unhappy: “I always told myself that I wouldn’t take a Lead position unless it could be agreed that I retain some hands-on, creative responsibility, after all that’s where I consider my strongest attributes to lie. I agreed to both Lead positions (Cinematic/Level Design) under that principle - I never understood the concept of promoting someone who is good at a certain thing into a position where they potentially don’t get to do that thing anymore, as they spend all their time organising others to do it. So far I’ve managed to maintain that creativity to some degree, though I would imagine it’s never going to be quite the same as it used to be, as I do have a team to manage now. On the flip side though, being able to control and co-ordinate the level design vision for a project and having a team to support in fulfilling that is quite an exciting new experience for me, so not all the organisation and planning is unenjoyable.” Specialization VS Broadening Skillsets For the level designers who aren’t afraid of management-related tasks and who are willing to give up hands-on work for bigger creative control, what would the interviewees recommend: specialize and strengthen abilities as an expert in level design further or broaden one’s skillset (e.g. getting into system design, writing etc.)? Paul believes it doesn’t necessarily have to be one or the other: “I think it’s possible to do both (strengthening abilities and broadening skillsets) simultaneously, it would really depend on the individual involved. I would say that a good approach would be to start with the specialisation in your chosen field and then once you feel more comfortable with your day to day work under that specialisation, take on work that utilises different skillsets and experiment to see if you find anything else you enjoy.” He started out as a pure level designer but subsequently held roles that involved game and cinematic design at Codemasters, Crytek and Dambuster Studios. “I’ll always consider myself a level designer at heart”, says Paul, “though it’s been incredibly beneficial for me to gain an understanding of multiple other disciplines, as not only has it widened my personal skillset but it has enabled me to understand what those disciplines have to consider during their day to day job roles, and it has helped me to strengthen the bond with those departments and my level design department as a result.” This advice is echoed by Todd who encourages level designers to learn about the different disciplines as “that knowledge will help solve issues that arise when creating a level.” 'Homefront: The Revolution' developed by Dambuster Studios and published by Deep Silver Sten also gained experience in related disciplines but ultimately decided to return to his passion and do level design. He explains: “It’s a good question and I feel I have been wondering about this myself regularly in my career. I think those priorities might change depending on your current situation, your age, your family situation, but also depending on the experience you gain in your particular field. (…) In my career, I was fortunate enough to try out different positions. For example, I was a Level Designer on Far Cry (PC), Lead Level Designer on Crysis 1 and Lead Game Designer on Crysis 2. Each position had different requirements and responsibilities. As a Lead Level Designer I was more exposed to the overall campaign planning and narrative for it, while on Crysis 2 I was more involved in the system design. However, my true passion is really on the level design side. I love creating places and spaces, taking the player on a cool adventure in a setting I am crafting. My skills and talents also seem to be best aligned on the level design side. I love the combination of art, design, scripting and storytelling that all come together when making levels for 1st or 3rd person games.” Picking The Right Studio As you can certainly tell by now, all of the interviewees have already made stops at different studios throughout their career. So each one of them has been in the situation of contemplating whether to pass on an offer or put down their signature on the dotted line. This brings up the question what makes them choose one development studio over the other? To Geoffrey it depends on what stage of your career you are in. “If you're trying to just get into the industry for the first time, then cast your net wide and apply to a lot of places. However, ideally, someone should pick a studio that makes the types of games they love to play. Being happy and motivated to work every day is a powerful thing.” This is a sentiment that is shared by all interviewees: the project and team are important aspects, but as they have advanced in their career other external factors have come into play: “It’s not just about me anymore, so the location, the city we are going to live in are equally important.” Sten says. Paul is also cautious of moving across the globe for a new gig. “The type of games that the company produces and the potential quality of them is obviously quite important – as is the team that I’d be working with and their pedigree. More and more over the years though it’s become equally important to me to find that balance between work and life outside of it. Working on games and translating your hobby into a career is awesome, but it’s all for nothing if you can’t live the life you want around it.” And it is not just about enjoying your leisure time with family and friends, but it will also reflect in your work according to Todd: “If my family is happy and enjoys where we live, it makes it a lot easier for me to concentrate on work.” He also makes another important point to consider if you are inclined to join a different studio solely based on the current project they are working on: “The culture of the studio is extremely important. I consider how the team and management work together, the vibe when walking around the studio, and the desk where I will sit. Projects will come and go, but the culture of the studio will be something that you deal with every day.” 'Star Citizen' developed and published by Cloud Imperium Games; screenshot by Petri Levälahti But it goes the other way around, too: When it comes to staffing up a team of level designers, these are the things that Todd looks for in a candidate: “First and foremost, I look for level designers that can take a level through all of the different stages of development: idea generation, 2D layouts, 3D layouts, idea prototyping, scripting, tuning, and final hardening of the level. People that can think quickly about different ideas and their possible positive and negative impacts. They shouldn’t get too married to one idea, but if they feel strongly enough about that specific idea they will fight for it. People that approach problems differently than I do. I want people that think differently to help round out possible weaknesses that the team might have. People who will look for the simplest and clearest solution vs. trying to always add more and more complexity.“ For lead positions, it goes to show yet again how important a designer's professional network is, as Todd for example only considers people that he already knows: “I try to promote designers to leads who are already on the team and have proven themselves. When I am building a new team, I hire people who I have had a personal working relationship before. Hiring people I have never worked with for such positions is simply too risky.” Ups & Downs While the career paths of the designers I interviewed seem pretty straightforward in retrospect, it is important to note that their journeys had their ups and downs as well. For instance Geoffrey recalls a very nerve-wracking time during his career when he decided to leave Infinity Ward: “We had worked so hard to make Call of Duty a household name but every day more and more of our friends were leaving. At a certain point it just wasn't the same company because the bulk of the people had left. The choice to leave or stay was even giving me heart palpitations. (…) After I left Infinity Ward, I started working at Respawn Entertainment and by work I mean - sitting in a big circle of chairs with not a stick of other furniture in the office - trying to figure out what to do as a company.” But he also remembers many joyful memories throughout his career: Little things like opening up the map file of multiplayer classic ‘mp_carentan’ for the first time or strangers on the street expressing their love in a game he had worked on. To him, shipping a game is a very joyful experience by itself and the recently released Titanfall 2 takes a special place for him. “The first Titanfall was a great game but we had so many issues going on behind the scenes it felt like we weren't able to make the best game we were capable of. (…) After all the trials and tribulations of starting a new game company, Titanfall 2 is a game I am very proud to have worked on.” 'Titanfall 2' developed by Respawn Entertainment and published by Electronic Arts As a response to the question of what some of the bigger surprises (good or bad) in his career have been thus far, Paul talks about the unexpected benefits of walking through fire during a project’s development and the lessons he learnt from that: “It surprised me how positively I ended up viewing the outcome of the last project I worked on (Homefront: The Revolution). I’d always thought I would aim to work on big, successful titles only, but I guess you don’t really know what’s going to be a success until it’s released. Obviously it was a disappointing process to be part of, and a lot of hard work and effort went into making it, despite the team always knowing that there were some deep lying flaws in the game that weren’t going to be ironed out. We managed to ride the storm of the Crytek financial issues in 2014, coming out on the other side with a mostly new team in place and yet we carried on regardless and managed to actually ship something at the end of it, which is an achievement in itself. I see the positives in the experience as being the lessons I learnt about what can go wrong in games production which stands me in good stead should I decide to take a more authoritative role somewhere down the line. Sometimes the best way to learn is through failure, and I don’t believe I’d be as well rounded as a developer without having experienced what I did on that project.” Last Words Of Advice At the end I asked the veterans if they had any pieces of advice they would like to share with less experienced designers. To finish this article I will quote these in unabbreviated form below: Geoffrey: “I guess the biggest thing for guys coming from community mapping is figuring out if you want to be an Environment Artist or a Geo-based Designer and if you want to work on Single-Player or Multiplayer. Each has its own skills to learn. I think a lot of guys get into mapping for the visual side of things but some companies have the environment artists handle the bulk of that work. So figuring out if making the level look great is more enjoyable to you or thinking it up and laying it out is, will help determine which career you should follow. Other than that, just work hard and always look to improve!” Todd: “BUILD, BUILD, BUILD. Have people play it, find out what they liked about it and what they didn’t. Build up a thick skin; people will not always like your ideas or levels. Try out new ideas constantly. What you think looks good on paper doesn’t always translate to 3D. Analyse other games, movies, books, art, etc. Discover what makes an idea or piece of art appeal to you and how you can use that in your craft.” Paul: “The games industry is not your regular nine to five job, and everyone is different so it’s difficult to lay down precise markers for success. Different specialisations have different requirements and you can find your choices leading to different routes than your fellow team members. You need to make sure you carve your own path and try everything you can to achieve whatever your personal goals are within the role; success will come naturally as a result of that. You need to be honest with yourself and others, open to criticism and willing to accept change. I’ve seen potential in people over the years hindered by stubbornness, succeeding in the games industry is all about learning and constantly adapting. Also it’s important to keep seeing your work as an extension of a hobby, rather than a job. The moment it starts to feel like a means to an end, you need to change things up to get that passion back.” Sten: “I always feel people should follow their passion. I firmly believe that people will always be the best, the most successful at something they love. Of course, it is a job and it pays your bills, but it’s also going to be something you are going to do for gazillions hours in your life, so better pick something you like doing.” Written by Friedrich Bode for mapcore.org What are your personal experiences? Do you agree with the statements made by the interviewees? Any advice you would like to share with fellow level designers or game developers in general? Let us know in the comments!42 points
 -
RELEASE Happy to announce that we just released County! This took us a while but we are super happy with the final results. Map is now ready to be played and enjoyed by others players. If you have any feedback, hit us here or in our DM's. Thanks to everyone who helped us trying to workout danger zone game mode and to everyone who provided us with their feedback! Workshop link Thanks!
 41 points
 -
41 points
-
Meet Your Contest Finalists... Mapcore's Mission: Mapcore contests earn mappers thousands of dollars, promote their work, and provide a well-deserved platform for their excellent levels. Teaming up with FACEIT, we've offered contestants the biggest mapping contest in Counter-Strike history! Thanks to FACEIT and to all participants. Your combined efforts are part of a long journey of growth and practice. At Mapcore, we intend to hold more contests and continue being a positive, engaging, helpful environment for all members seeking to improve and grow. What's Next? In one month, 4 of these 10 maps will be selected as Grand Finalists by our Mapcore Judges and Guest Experts! We look forward to seeing all of the community feedback, iteration, and improvements awaiting these brilliant maps. Rules: Click here to read full Contest rules. Reminder: Grand Finalist maps receive exciting prizes and will be officially featured on FACEIT. TOP 10 FINALISTS: *In Alphabetical Order Abbey by Lizard, thewhaleman https://steamcommunity.com/sharedfiles/filedetails/?id=1215935299 Apollo by Vaya, CrTech, Vorontsov, JSadones https://steamcommunity.com/sharedfiles/filedetails/?id=1206809088 Asylum by Libertines https://steamcommunity.com/sharedfiles/filedetails/?id=864761519 Biome by Jd40 https://steamcommunity.com/sharedfiles/filedetails/?id=1224923995 Berth by grapen https://steamcommunity.com/sharedfiles/filedetails/?id=1216945465 Kaizen by Andre Valera https://steamcommunity.com/sharedfiles/filedetails/?id=1216362919 Offtime by Squad http://steamcommunity.com/sharedfiles/filedetails/?id=1216276542&searchtext= Sirius by Exodus https://steamcommunity.com/sharedfiles/filedetails/?id=1217279476 Studio by ZelZStorm, TanookiSuit3, Hollandje https://steamcommunity.com/sharedfiles/filedetails/?id=1204635926 Tangerine by Harry Poster https://steamcommunity.com/sharedfiles/filedetails/?id=1202481627 CONGRATULATIONS, FINALISTS!


 41 points
 -
Hi, some screenshots from DM-Dome, a map I was doing for the Epic+Mapcore contest. I finally had some time to finish it.


 41 points
 -

WIP in WIP, post your level screenshots!
Smileytopin and 40 others reacted to K for a topic
Hi everyone, i'm new here! Something that i'm working for csgo It's a hostage rescue map "cs_leika" Hope you like Ct Spawn: Some foliage models by Thomas 'Hessi' Hess (cypress and ivy models)

 41 points
 -

WIP in WIP, post your level screenshots!
GrillusRetardus and 39 others reacted to michal3210 for a topic
some screenshots from my latest project, on which im working on in free time! It still needs some improvements, but it looks good in current state I think dz_Arctic! 40 points
 -
Hey here's some of our progress. The map is coming along nicely and hopefully it will be in a playable state by the deadline ? A sizable part of the map is still fully greyboxed so we're working to finish that up. We're also thinking of ways to colorize it or add more contrast because right now it's looking a bit flat. We'll probably go with black marble elements with white/gold writing on them. And some more overgrown stuff by the coast.40 points
-
de_scepter
OrnateBaboon and 39 others reacted to grapen for a topic
A map made by grapen. Workshop: http://steamcommunity.com/sharedfiles/filedetails/?id=972609667 Special thanks to a couple members of this community who's documentation and/or support was of great help: @will2k, @Yanzl, @Squad, @[HP] - and of course an extra special thanks to the staff for running this joint. This map was a first in many ways for me: my first source engine map, my first meshes and my first textures/materials. I've made a ton of mistakes, but I learnt from every single one of them (I'd like to think). It honestly wouldn't have been possible without this great community, so thanks everyone for commenting, liking and PM:ing. Every last bit of motivational boost counts. Until next time.40 points -
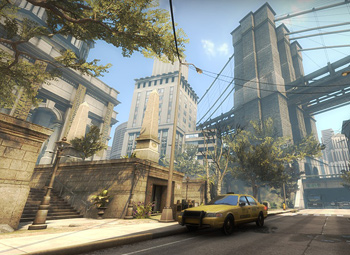 The creation of a map begins with an idea. In the case of my most recent project, CS_MUSEUM, I needed a basic look which would resonate with players immediately. The thought of making a Museum worked… it was a simple one, it had been done before (although this wouldn't be a re-make of the classic DE_MUSEUM by Theropod-X). Players would understand a Museum environment, and it fit in the Counter-Strike world. Forming a map’s final look is complicated, though, and requires thought about what kind of architecture, colors, and lighting you – an artist or level designer – will pursue. I’d been playing a lot of the classic map CS_OFFICE, which requires players to storm into close quarters for indoor combat. That kind of game-play is fast and unforgiving, I dig the kind of matches it creates. CS_ASSAULT, I shouldn't forget to mention, is another great map that defines the "siege a building and rescue the hostages" genre. Actually, most of my favorite CS_ maps including Militia also foster similarly dynamic games that challenge you to be sneaky but also use brute force to accomplish your objectives. So, I set out to make a hostage rescue map like Office and its kin. Studying prior maps is a good way to establish what works well, and avoid what doesn't. One other map that influenced my thinking: CS_CABARET by Alex Roycewicz. Cabaret is a great map — it got Alex a job at Infinity Ward long prior to that illustrious studio being kicked in the nuts super hard by mega-publisher-that-will-remain-unnamed. It was from Cabaret that I basically ripped off the front of Museum... with a few changes. In truth, though, I had some bones to pick with Cabaret. Unforgivably, there was no sense of vertical space on the outside of the strip club. Also, while the building exterior is convincingly rendered, the overall space is too geometric: everything seems to face the viewer on an imaginary grid, which is no coincidence, that’s how the Hammer editor encourages people to make maps. Cabaret on the grid: Museum screws the grid: If this analysis is starting to sound harsh, it’s worth noting that Cabaret was one of the best custom maps of its time, so this is more of a modern critique of older game art. As is often the case with older game art, most of the limitations or flaws obvious to modern eyes were not the creator’s fault: Hammer around the era of Counter-Strike: Source (for which Cabaret was made) did not have all the technology I made use of for Museum. One example is “instances” (the pale green elements in the overview above) which are brushwork more akin to models than typical brushwork, because they can be rotated “off the grid” and not cause compilation problems normally associated with brushwork which is off the grid. Thanks to instances, I was able to rotate buildings to achieve a more natural, organic look — such as this bridge: In order to actually create the specific buildings in the map, concept art and photographic references were key. Here's an explanation of the Museum front. End product: First iteration: Reference photograph: The most pertinent point to make here is the difficulty of knowing when a photographic reference is valuable, and what makes it valuable. To explain this in extreme detail might be delving into an area of “talent”... or it might be worth the subsequent explanation I’ll now provide. In any case, this should explain my process. The best photographic references share one crucial element: readability. Complex buildings such as the one above, if they are to be useful for our purposes, must be able to be broken down into clean, clear shapes. I was confident using the logic explored in the line-work above (I did this part in my head), that the building could be broken down and translated successfully. The building begins to take shape, with the red lines becoming props. When using Hammer, what becomes a prop and what remains brushwork largely comes down to the default assets you have to work with. Talented 3D modelers have their choice of creating new content, but their time is precious and each art asset is an investment, so even then it’s best to think about default materials and their role in your work. This lovely picture inspired the placement of the obelisks, and secondarily the pond on the right of the Museum. Using concept art and photos in conjunction with my imagination, I had derived a basic visual identity for the map: Obvious reference: the Brooklyn bridge; non-obvious reference, this lovely piece from Deviant Art: Making a map is about looking at the world around you and seeing something inspiring enough to create a desire within you to render it and mold it for your own purposes. By this point in time you may be shouting IT’S A MAP – TALK ABOUT THE GAME-PLAY, TALK ABOUT THE GREY-BOXING YOU FOOL! …and, while the playability of Museum ended up better than I could have imagined, there is no glory in my process for that particular aspect of the map. Uh oh, he’s gonna say he didn’t grey-box it, isn’t he… First, the excuses: previously, I'd recreated the Natural Selection 1 map NS_VEIL for NS2, based solely upon my own literal eyeballing of the geometry, without any scale-guide, in a different editor and a different unit system. To put all that gibberish into other words, I’d done nothing for two months other than study the rigid grey-boxery of another mapper, then spent another 10 months making that geometry fit into the context of a new game and engine. I’d worked with fastidiously organized layers, done everything by the book, guv, I swear. While important for a commercial product, that experience had temporarily tired me somewhat of the (smarter) formalistic approach. As a result, no substantial grey-boxing would take place for Museum. Manic energy took the place of “rules” and “common sense”: Basically, I was creating stuff I thought looked cool, not getting terribly fussed about what direction it would all head. This is the way newbie mappers work, or idiots, or both… but it can be done if you’re smart about it. Certain things can’t be bullshitted around, though: your map must be in proper proportion to the players, and it must maintain sensible sight-lines considering the game type. You need to know the game you’re making the map for, and know it well. So working free-form has its advantages, creating a whimsical sense of liberation in the budding mapper. It comes at big costs to him, though, in other aspects. This open doorway, and the entire route it signified, never made it into the final product. People have noticed its conspicuous absence, however, to the point that it may make it's return soon enough. Working toward a result, with certain restraints in mind, but willing to cut: my method for Museum. Mistakes were made. Certain areas violated basic good-practice principles, such as this one: I call this piece of modern art “Abstract Red Light Number 48.” So… this elevator shaft was painful for a few reasons: too noisy inside, not clear enough about what it was meant to be, and the idea of it having a purpose seemed impossible given the amount of crap stuffed into the scene. I believe I settled on a better, cleaner result: Which was based off of this reference: This shipping area was another idea that got cut (considering that it was over-dark, this was not too sad): Based on: Everything else seemed to go swimmingly, however: My biggest advantage when working with these references is my ability — and perhaps your ability as well — to discern from them what elements are most relevant and work best geometrically. These judgements influence what makes it into the map. While you may be able to follow a similar protocol by examining the pictures, you would be doing so in hindsight; it was quite necessary during this project for me to be able to sift through literally thousands of images in order to find those which, at first glance, provided the requisite inspiration. References must be clean, they must convey a certain tone, and the architecture they illustrate must be plausible among the rest of the map geometry. This process of looking through seemingly endless references is a task which must be begun anew with every new map. Back on topic: a month or two after starting out on the map, I recruited a talented 2D artist named penE who had a style congruent with mine. With his help, rooms like this began to form their own identity: The map began to develop a sense of humor. We based the name of the museum on HURG — Hero of MapCore! (Don't ask.) PenE brought his full enthusiasm to the project, getting almost all of his work done in a month or so, a rapid pace which would be a major motivator for me while I was working with (read: waging war against) the Hammer editor. Here is a sample of penE's work for the map: Nevertheless, the map did seem to require more art… I had envisioned a T-Rex in the above room, and had designed the room around that eventuality. I was concerned that such a 3D model might not fit well (it’s a relatively cramped room), or might not be appropriate looking, but I put out a call for a talented 3D artist. 3Dnj answered that call with a stunning T-Rex model based on square-shaped geometric restraints. I basically stacked a bunch of cubes on top of one another and said, “OK now make me a T-Rex that fits inside the squares.” Seems hopeless, right? Thankfully, Valentin, as 3Dnj is known, e-mailed me this bad boy: Owns right? Imagine waking up and seeing that first image of the T-Rex with that brilliant sheen, I was ecstatic. At that point I realized I’d found a true collaborator and not just a “prop guy”. Valentin would go on to help me optimize the map, and reform a lot of my map geometry into more sensible models. Here’s how crazy things had gotten: Hammer is unlike a modeling program in that it is “brush-based”, and things that are not literally six-sided cubes give the editor trouble. Trying to create an interesting shape out of a single brush? Take a hike. So it’s obvious why a more extensive collaboration was needed: it was never going to be realistic to proceed in such a manner and expect an optimized result which would (ugh) compile. Hence, the logic of making a map which looks the way Cabaret does, unfortunately all the same limitations applied more or less in 2012, with just a few exceptions like instances. So there were technical challenges, but four months on, most of the major lessons of the map were learned and my vision for the map was realized almost exactly as it existed in my brain. My workflow can be best summarized as: find a fitting photographic reference, get a basic interpretation of the geometry into the game, and then polish with aesthetics and navigation in mind (lead players with lights and colors). Phase 1: Phase 2: Phase 3: Rather than attempt to convince you I pursued the traditional level-design approach of iterating a grey-box, I hope this document serves to explain the approach I actually took: a risky and improvisational one that I know I’m lucky was successful. It’s good to state how lucky: a layout that emerged without argument, finding two brilliant collaborators with a lot of faith in the project, etc. Hopefully anyone looking to duplicate my exact method will be given pause, but at the end of the day there will always be logic in working hard and having a well-formed mental image of your goal. As for Museum, I can promise you one thing: if you load up the map, and I hope you will, I think you will enjoy it. (If only for the giant, motherfucking Tyrannosaurus Rex.) Thanks for reading.40 points
 -
Thanks everyone for the feedback! Here's a thing:40 points
-
[CS:GO] de_highlands (WIP)
spa and 39 others reacted to ElectroSheep for a topic
Not a big update but still working on this :40 points


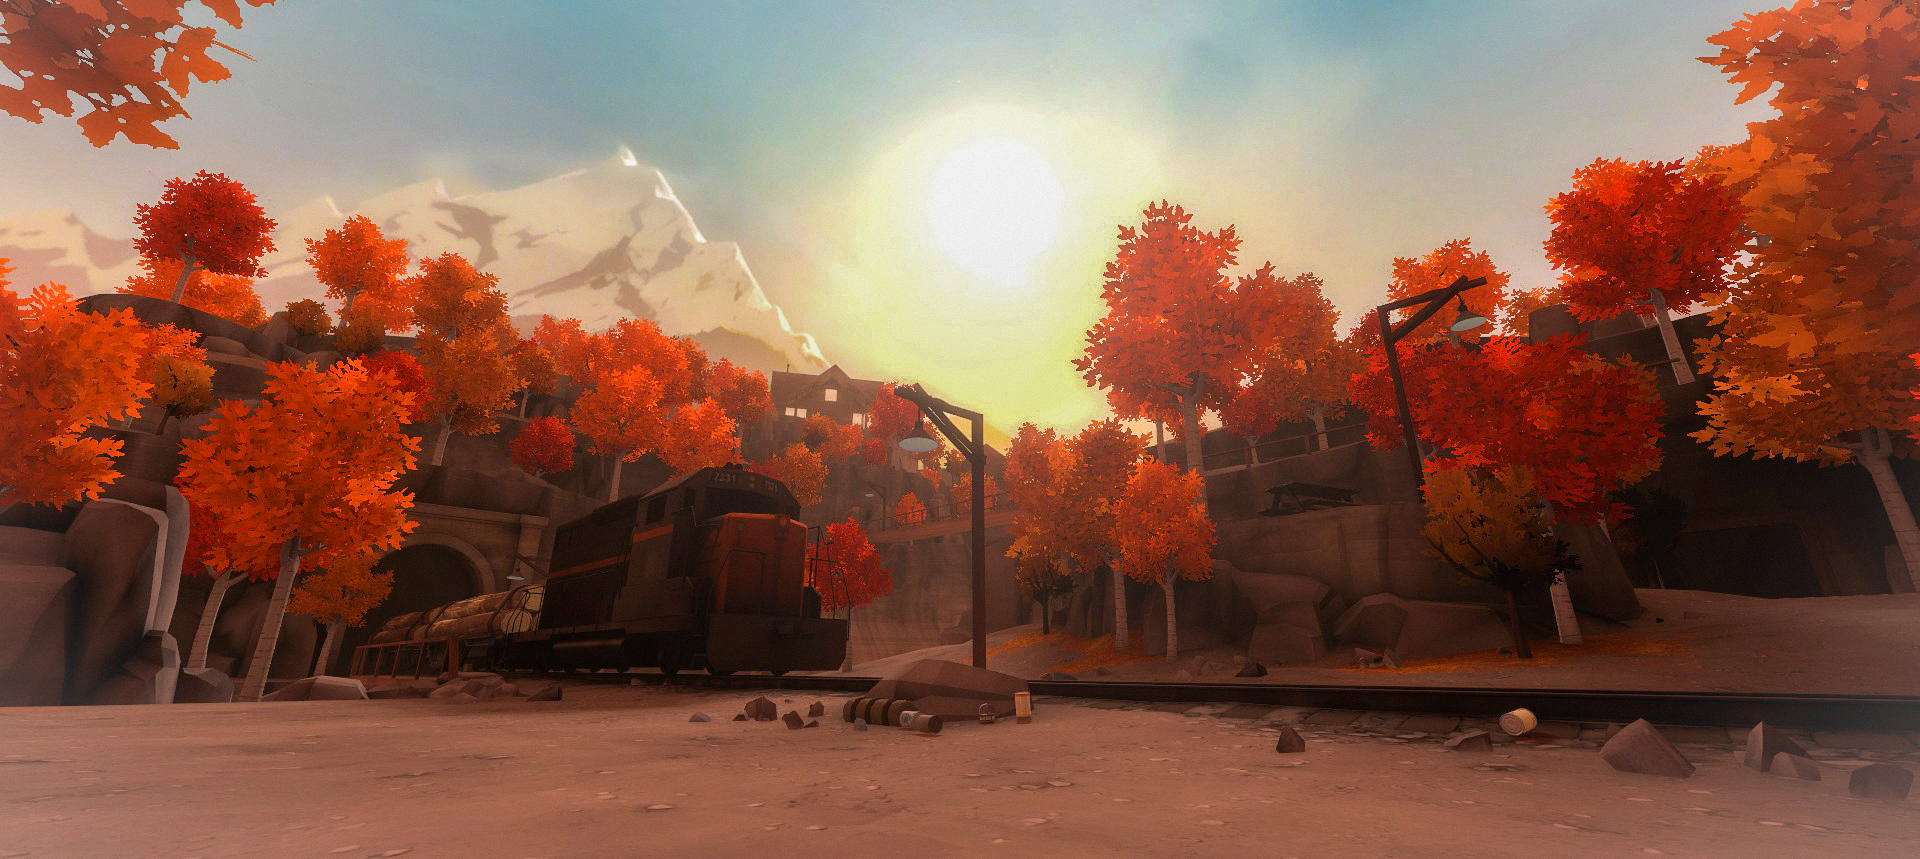


.jpg.f5c0765cd1501c0641530cb459a41c8e.jpg)
.jpg.0da0a3647abe76779fbda974f3bb62ae.jpg)
.jpg.e6f01cf411c6704670a64934df65fd4d.jpg)
.jpg.807b597b7e854ee6ced12c8cef96f9c9.jpg)
.jpg.3e5659bcee67dca51b2d1d4bf4d53c73.jpg)
.jpg.5e58f35f7d143cc588debad41c5e0d46.jpg)
.jpg.53f433a0837866a28e33a4751926541c.jpg)
.jpg.06b0a06d097067dd74b657bfa028abe5.jpg)
.jpg.c7774e78c849dfafd0db77141a26239c.jpg)
.jpg.96542c7635882a2ef27fbfd2955d96fa.jpg)
.jpg.5974b9dba8ab852d6c7b185992d457c0.jpg)
.jpg.abc80afc3f3602b382380dc40373b7b7.jpg)